Melbourne has long been recognised for its refined sense of style, cultural depth, and architectural character. From heritage-listed buildings to contemporary rooftop venues, the city offers an impressive range of elegant event spaces suited for weddings, corporate gatherings, gala dinners, milestone celebrations, and exclusive launches.
Luxury finishes or a central location do not simply define an elegant event venue in Melbourne. It is defined by atmosphere, design harmony, service excellence, and the ability to create a memorable experience from the moment guests arrive.
In exploring Elegant Event Venues Melbourne, one name often stands out in conversation: Higher Ground. Many people ask, what is the Higher Ground Melbourne venue? This guide will not only answer that question in detail but will also explore the broader landscape of sophisticated venues across the city.
By understanding the defining qualities of elegant venues and examining some of Melbourne’s most admired spaces, you will gain clarity on what truly elevates an event from ordinary to exceptional.

Elegance in an event venue goes beyond chandeliers and polished floors. It involves architectural intention, thoughtful spatial design, refined service standards, and a cohesive guest experience.
An elegant venue often has a strong architectural identity. In Melbourne, this can range from restored industrial buildings with dramatic ceilings to heritage theatres with ornate detailing. The architectural style sets the tone for the entire event. High ceilings create grandeur, natural light enhances warmth, and carefully preserved historical elements add depth and authenticity.
Melbourne’s inner-city venues frequently blend old and new design elements, preserving original brickwork or stone facades while incorporating contemporary finishes. This balance reflects the city’s broader design philosophy: sophisticated yet approachable.
Interior styling contributes significantly to elegance. Neutral palettes, curated lighting, high-quality furnishings, and thoughtful layout planning all enhance visual cohesion. Elegant venues often offer flexible styling options that allow event organisers to personalise décor without overwhelming the space.
Ambient lighting, acoustic treatments, and spatial flow are carefully considered in refined venues. The result is an environment where guests feel comfortable, impressed, and immersed in the occasion.
One of Melbourne’s most talked-about event spaces is Higher Ground. Located in the city’s central business district, Higher Ground is a multi-level venue housed in a heritage-listed power station building. Its distinctive architectural presence and sophisticated interior design have made it a sought-after destination for events.
Higher Ground occupies a dramatic former power station with soaring ceilings, arched windows, and layered levels. The venue’s design incorporates industrial elements such as exposed brick and steel beams while balancing them with contemporary finishes, warm timber accents, and lush greenery.
The vertical layout creates visual interest and spatial depth. Guests experience different vantage points across multiple levels, adding movement and dimension to events. The natural light that filters through large windows during daytime functions enhances the atmosphere, while evening events benefit from carefully curated lighting that highlights architectural features.
Higher Ground is known for hosting corporate functions, product launches, private dinners, and stylish celebrations. The venue offers adaptable spaces suitable for seated dining or cocktail-style events. Its catering program emphasises modern Australian cuisine with refined presentation, which contributes to its reputation as an elegant venue.
What distinguishes Higher Ground from many other venues is its ability to combine hospitality excellence with architectural drama. Rather than feeling like a conventional function hall, it feels like a curated destination experience.
While Higher Ground is highly regarded, Melbourne offers a diverse selection of elegant venues suited to different event types and scales.
Arts Centre Melbourne is one of the city’s most iconic cultural institutions. Beyond its theatres and performance halls, it offers sophisticated event spaces ideal for galas, corporate functions, and formal receptions.
The interiors of Arts Centre Melbourne exude refinement, with sweeping staircases, dramatic foyers, and premium finishes. Hosting an event within this landmark adds prestige and cultural resonance. The venue’s location along the Yarra River further enhances its appeal, offering scenic backdrops for evening events.
Arts Centre Melbourne provides advanced lighting and sound systems, as well as experienced event teams. This ensures seamless execution for formal dinners, award ceremonies, and high-profile gatherings.
State Library Victoria is another elegant venue that merges heritage architecture with modern event capabilities.
The La Trobe Reading Room, with its iconic domed ceiling, offers a breathtaking setting for events. Marble floors, classical columns, and high ceilings create an atmosphere of timeless sophistication.
The State Library accommodates weddings, corporate receptions, and private celebrations. Its blend of history and refined design makes it a standout choice for those seeking elegance rooted in heritage.
Crown Melbourne offers a range of luxury event spaces within its integrated resort complex.
Crown’s ballrooms and private event rooms feature polished interiors, grand chandeliers, and flexible layouts. The venue caters to both intimate gatherings and large-scale gala dinners.
With in-house catering, accommodation, and entertainment options, Crown Melbourne provides a complete event experience. Its ability to combine scale with luxury reinforces its position among Melbourne’s premier elegant venues.
Modern elegance in Melbourne often features elevated or waterfront locations with scenic views.
Venues along the Yarra River offer sweeping views of the city skyline. These spaces are particularly popular for wedding receptions and corporate cocktail events, where natural scenery enhances ambience.
Rooftop venues combine open-air elements with sophisticated styling. They often feature glass enclosures or retractable roofing to accommodate varying weather conditions. The elevated setting symbolises exclusivity and refinement.
Selecting the right venue requires balancing aesthetic preferences, logistical needs, and guest experience.
A wedding may require romantic lighting and intimate dining areas, while a corporate gala might demand stage space, audiovisual capabilities, and formal seating arrangements. Understanding the event’s purpose guides venue selection.
Elegant venues manage guest flow seamlessly. From arrival points to dining areas and dance floors, spatial planning ensures comfort without overcrowding.
High-quality catering and attentive service elevate the overall experience. Many elegant venues in Melbourne offer curated menus, beverage packages, and professional event coordinators.
Design consistency enhances event storytelling. Floral arrangements, table settings, lighting, and staging should complement the venue’s architecture.
At Higher Ground, for example, minimalist styling often works best to highlight the space’s industrial elegance. In contrast, heritage venues may benefit from classic décor that complements their architectural details.
What is the Higher Ground Melbourne venue?
Higher Ground is a multi-level restaurant and event venue located in a heritage-listed former power station in Melbourne’s CBD. It is known for its dramatic architecture, refined interiors, and ability to host stylish corporate and private events.
Is Higher Ground suitable for weddings?
Higher Ground is better suited to corporate functions, private dinners, and cocktail-style celebrations, though smaller, modern wedding receptions can be hosted depending on guest numbers and layout preferences.
What makes an event venue elegant?
An elegant event venue combines architectural character, refined interior design, professional service, high-quality catering, and thoughtful spatial planning to create a cohesive and sophisticated guest experience.
Melbourne’s elegant event venues reflect the city’s design sophistication and cultural richness. From heritage institutions such as the State Library Victoria and Arts Centre Melbourne to contemporary destinations such as Higher Ground and Crown Melbourne, each venue offers a distinct interpretation of elegance.
So, what is the Higher Ground Melbourne venue? It is a striking multi-level event and dining space set within a restored power station, celebrated for its architectural drama and refined hospitality. It represents the modern face of Melbourne elegance—industrial yet polished, historic yet contemporary.
Ultimately, choosing an elegant event venue in Melbourne involves more than selecting a beautiful room. It requires understanding how architecture, service, location, and atmosphere come together to create a seamless and memorable experience. With its diverse selection of sophisticated venues, Melbourne continues to set the benchmark for refined event hosting in Australia.
Debt can start quietly. A credit card is used in an emergency. A personal loan taken during a transition. A few missed payments when life becomes unpredictable. Over time, what once felt manageable begins to feel heavy. Statements arrive more frequently than progress, and interest accumulates faster than confidence. This is when many people ask the critical question: What is the best debt relief strategy?
The truth is that there is no universal, one-size-fits-all solution. The best debt relief strategy is the one that aligns with your income, your obligations, your long-term goals, and your emotional capacity to stay consistent. Secure Debt Relief Planning is not about quick fixes or shortcuts. It is about structured, informed, and sustainable action that restores financial stability while protecting your future.
In this comprehensive guide, we will explore what debt relief truly means, examine the most effective strategies available, and explain how to design a secure, responsible path toward becoming debt-free without jeopardising long-term financial wellbeing.
Debt relief refers to any strategy designed to reduce, restructure, or eliminate debt in a way that improves your financial position. However, not all debt relief methods are equally safe or sustainable.
Security in debt relief means protecting your credit standing where possible, avoiding scams, preserving essential assets, and ensuring that the solution does not create a larger problem later.
Quick relief often focuses on immediate reductions in payments or balances without considering long-term consequences. Secure relief planning evaluates total repayment costs, credit impact, legal implications, and behavioural changes needed for lasting success.
When stress is high, the temptation to accept the first solution offered can be strong. However, thoughtful planning ensures that relief today does not become regret tomorrow.
The best debt relief strategy depends on your financial situation. For some, aggressive repayment through budgeting works best. For others, consolidation, refinancing, or structured negotiation may be appropriate. In extreme cases, formal insolvency processes may be necessary. The key is matching the strategy to the circumstance.

Before selecting a strategy, you must understand your full financial picture.
Include credit cards, personal loans, car loans, buy-now-pay-later balances, overdue utilities, and any informal loans. Note balances, interest rates, minimum payments, and due dates.
This ratio reveals how much of your income is consumed by debt. High ratios indicate the need for structural changes rather than minor adjustments.
Track monthly income and expenses to determine how much can realistically be allocated toward repayment. Without this clarity, any strategy becomes guesswork.
For individuals with stable income and manageable balances, structured repayment may be the best solution.
This method prioritises debts with the highest interest rates. By reducing expensive interest first, you minimise total repayment cost. While mathematically efficient, it may take time to see emotional wins if high-interest debts also have large balances.
This method prioritises the smallest balances first. Clearing small debts quickly builds motivation and psychological momentum. Though slightly less cost-efficient than the avalanche method, it can improve adherence.
Some individuals combine methods by targeting high-interest small debts first, blending efficiency with motivation.
Debt consolidation combines multiple debts into one loan, often at a lower interest rate.
Unsecured personal loans can simplify repayments and reduce interest if your credit profile qualifies for competitive rates.
Zero-interest introductory promotions can be effective if repayment occurs before promotional periods end.
Using home equity to consolidate unsecured debt may reduce interest, but increases risk. Converting unsecured debt into secured debt should be approached cautiously. Consolidation works best when spending habits change simultaneously. Without behavioural adjustments, debt can reaccumulate.
Creditors often prefer structured repayment over default.
Temporary payment reductions or interest pauses may be available during financial hardship.
Negotiating lower rates can significantly reduce long-term repayment costs.
Spreading balances over longer periods may reduce monthly strain, though it can increase total interest paid. Open communication is often more effective than avoidance.
Financial counselling services can structure repayment agreements with multiple creditors.
You make a single payment to the management service, which distributes funds to creditors under negotiated terms.
Professionals often secure better terms than individuals negotiating alone.
Ensure that service providers are reputable and transparent about fees.
Debt settlement involves negotiating to pay less than the full balance owed.
Typically used when repayment in full is unlikely.
Settlements may negatively affect credit standing.
Forgiven debt may be treated as taxable income in some cases. Settlement is often a last resort rather than a first option.
In severe cases, legal insolvency processes may provide relief.
This eliminates many debts but significantly impacts credit and assets.
Structured legal agreements can provide partial repayment plans under regulated conditions. These options require professional legal advice.
Financial plans fail without behavioural support.
Identifying triggers for overspending prevents future debt.
Even small savings reduce reliance on credit during setbacks.
Acknowledging progress maintains motivation.
Desperation can attract unethical providers.
Upfront fees without clear documentation. Guarantees of instant debt elimination. Pressure to act immediately.
Check licensing, reviews, and regulatory compliance. Secure debt relief planning always prioritises transparency.
Eliminating debt is only the beginning.
Small, manageable credit usage paid in full each month restores credit scores.
Redirect former debt payments toward emergency funds and investments.
Understanding interest, compounding, and budgeting prevents recurrence.
Different scenarios require different approaches.
Self-managed repayment may suffice.
Consolidation combined with budgeting may be optimal.
Professional debt management or formal agreements may be necessary. Matching strategy to severity ensures security.
Avoidable errors can delay progress.
Debt relief without behavioural change is temporary.
Lower payments may increase long-term expenses.
Complex situations benefit from expert evaluation.
Reducing expenses is only one side of the equation.
Career development increases repayment capacity.
Part-time work or freelance projects can accelerate progress.
Tax refunds or bonuses can significantly reduce principal balances. Income growth strengthens relief strategies.
As balances decrease, stress diminishes.
Reduced financial anxiety improves well-being.
Progress builds self-trust in financial decision-making.
Clear plans replace uncertainty with direction.
What is the best debt relief strategy overall?
The best strategy depends on your financial situation. For manageable debt, structured repayment may work best. For larger balances, consolidation or professional assistance may be appropriate.
Is debt consolidation better than negotiation?
Consolidation works well when interest rates can be reduced. Negotiation may be better during hardship or when credit scores limit loan approval.
Can I recover financially after severe debt?
Yes. With structured planning, behavioural change, and consistent effort, financial recovery is achievable.
The best debt relief strategy is not the fastest, loudest, or most dramatic option. It is the one that restores control without creating future risk. Secure Debt Relief Planning balances immediate relief with long-term financial health.
By assessing your situation honestly, choosing a strategy aligned with your income and goals, and committing to behavioural change, you transform debt from an overwhelming burden into a manageable challenge. Relief is not about escape. It is about structure.
It is about understanding your numbers, protecting your assets, and building habits that prevent repetition. Debt does not define your financial future. Thoughtful planning does. With clarity, discipline, and informed decisions, financial stability is not only possible — it is achievable and sustainable.
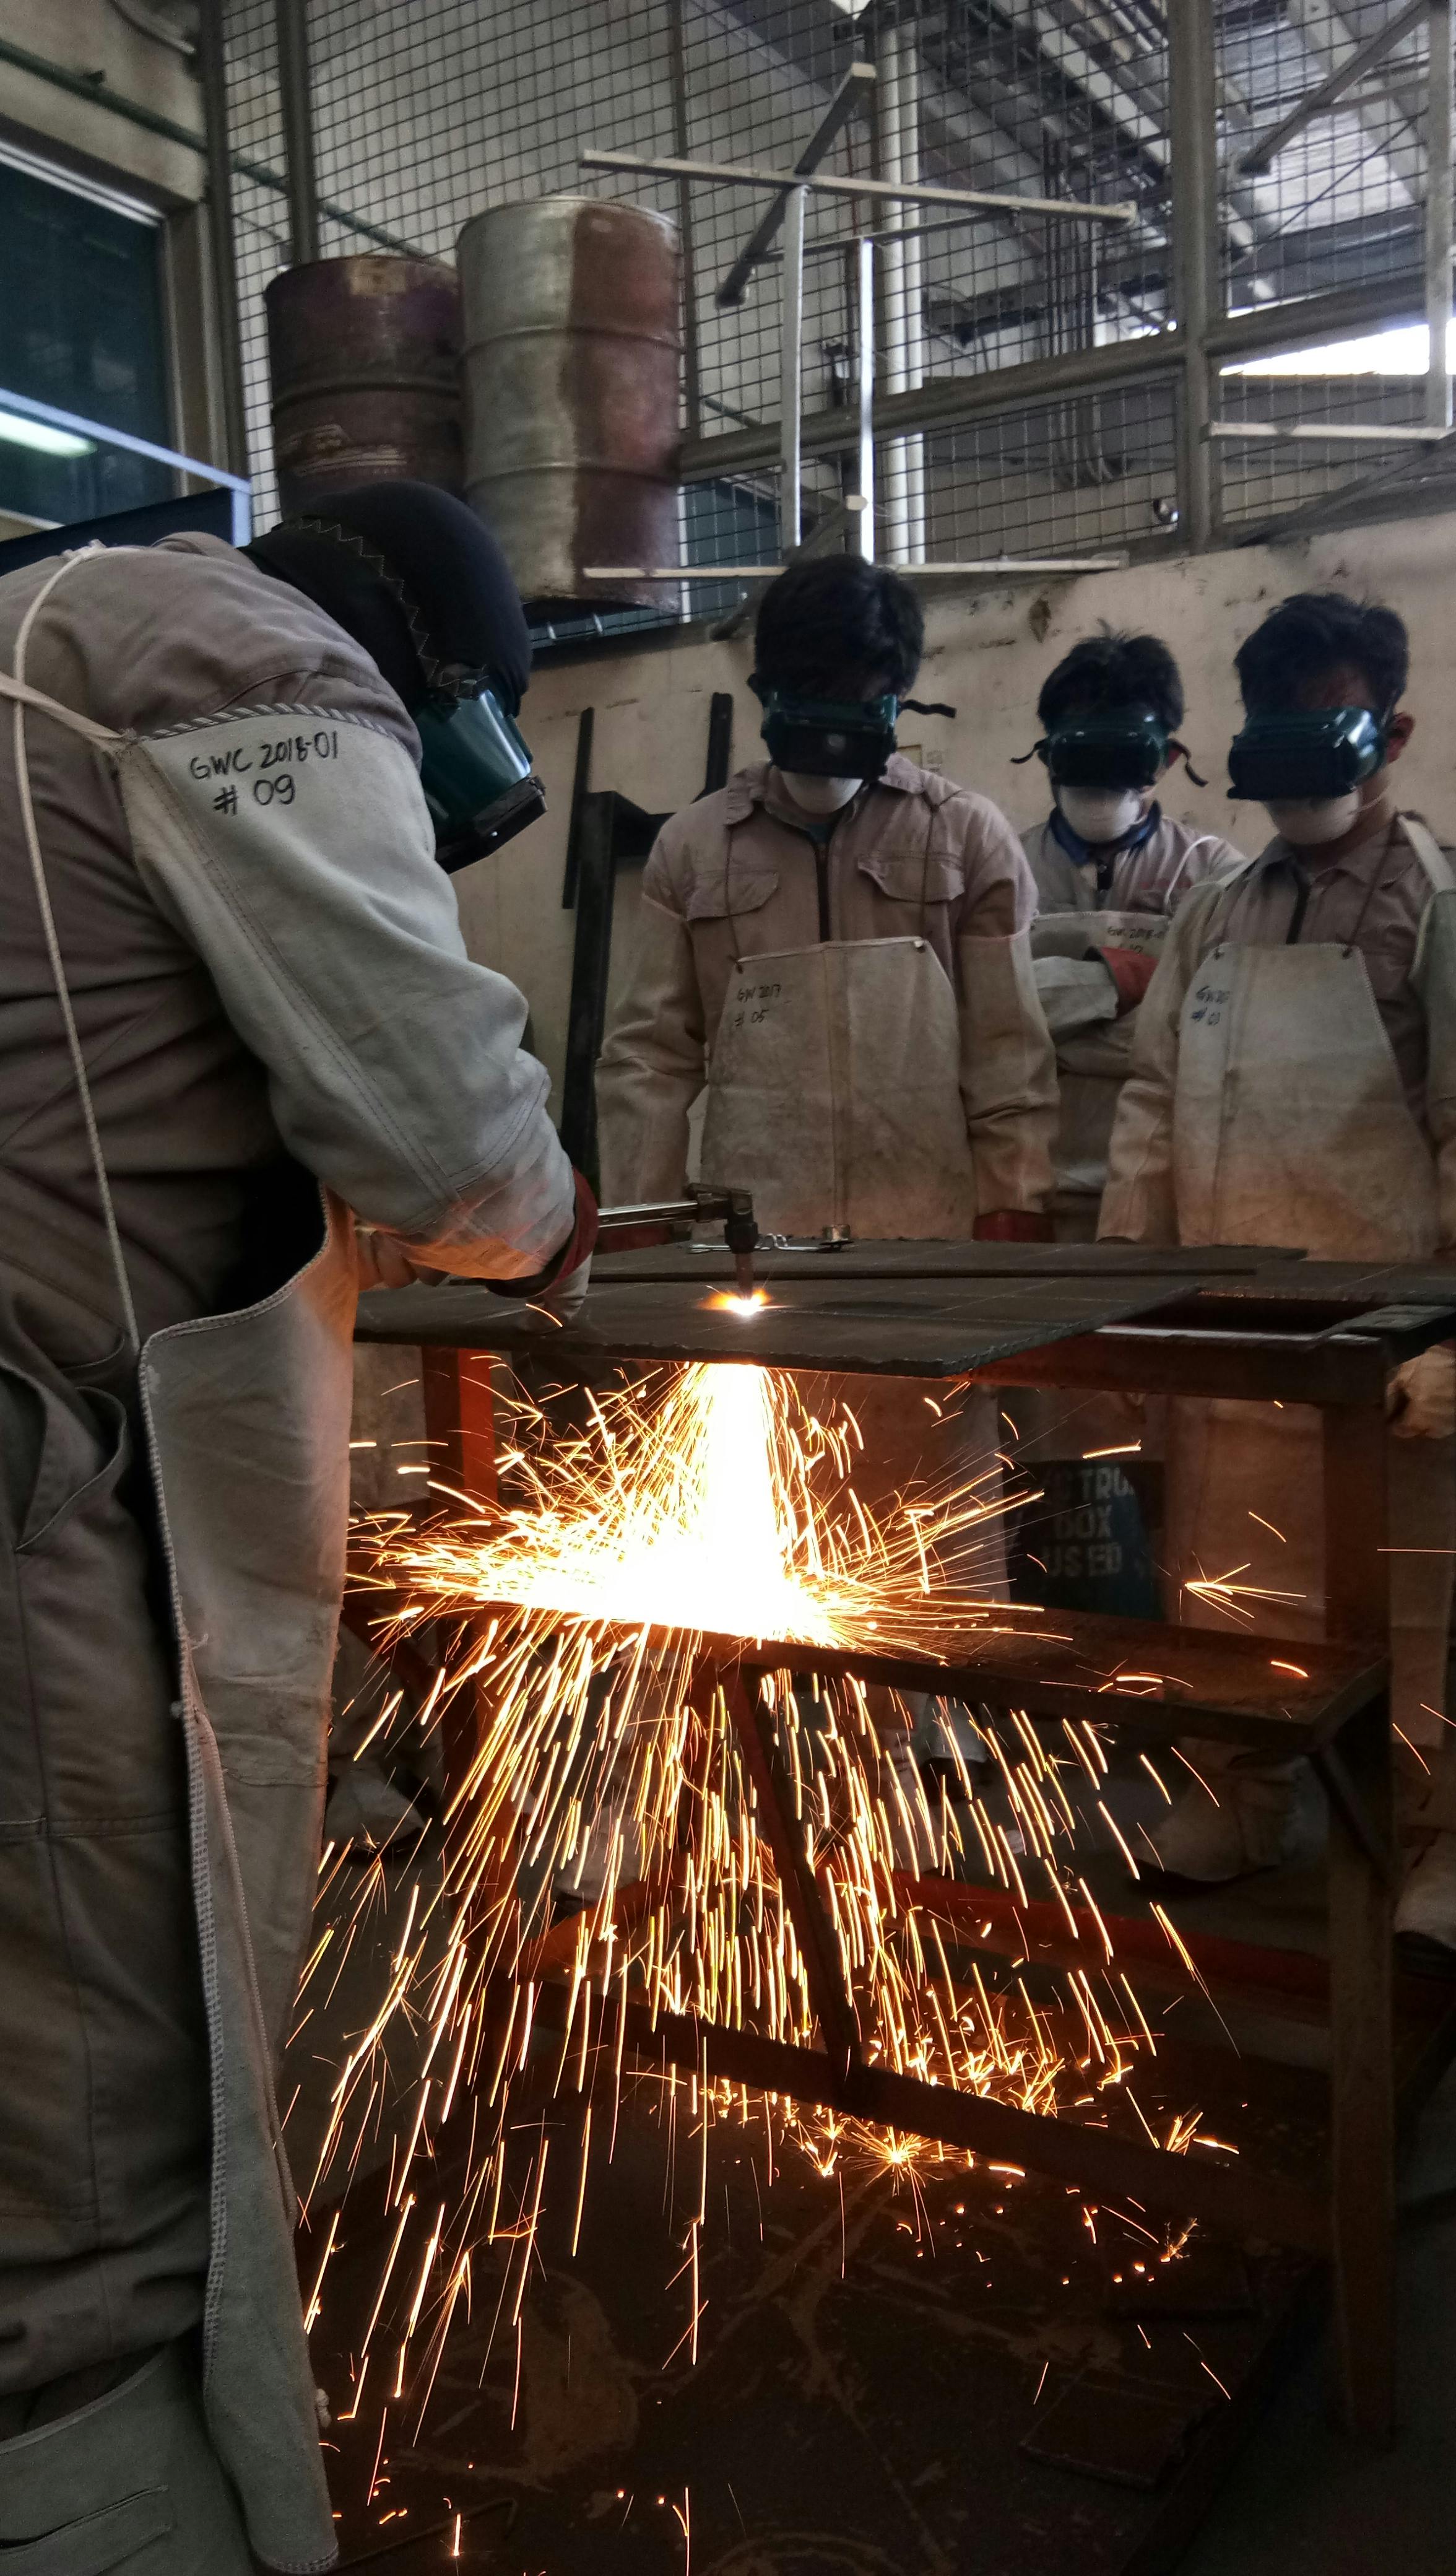
Steel fabrication has long been a cornerstone of construction, manufacturing, and engineering. However, as industries evolve and demand tighter tolerances, lighter components, and highly detailed assemblies, traditional fabrication methods alone are no longer sufficient.
This is where precision steel fabrication becomes essential. It represents a refined approach to shaping, cutting, and assembling steel with exact measurements and strict quality control.
This article explores Precision Steel Fabrication in depth and answers the central question: What is precision sheet metal fabrication? By examining processes, technologies, materials, applications, advantages, and quality standards, this guide provides a comprehensive understanding of how precision fabrication supports modern industry.
Precision steel fabrication refers to the highly controlled process of cutting, shaping, bending, and assembling steel components with extremely tight tolerances and exact measurements. Unlike conventional fabrication, which may allow for broader dimensional flexibility, precision fabrication demands accuracy often measured in fractions of a millimetre.
Precision steel fabrication is commonly used in industries where component fit, performance, and safety depend on exact specifications. These industries include aerospace, automotive manufacturing, electronics, medical equipment production, energy systems, telecommunications, and advanced construction projects.
Precision fabrication integrates advanced technology, skilled craftsmanship, and strict inspection procedures to produce steel components that meet exact engineering standards.
Precision sheet metal fabrication is a specialised branch of steel fabrication that focuses on manufacturing thin steel sheets into precise components using advanced cutting, bending, forming, and assembly techniques. It involves working with sheet metal materials—typically ranging from thin gauge to moderately thick sheets—and shaping them into products that require high dimensional accuracy.
The process uses computer-controlled machinery such as CNC laser cutters, punch presses, press brakes, and automated forming equipment to ensure consistent results. Precision sheet metal fabrication is commonly used to create enclosures, panels, brackets, housings, cabinets, chassis, ductwork, and intricate assemblies for industrial and commercial applications.
The defining feature of precision sheet metal fabrication is its emphasis on tight tolerances, repeatability, and consistent quality across production batches.
Precision is critical in many modern applications because even minor dimensional variations can cause assembly issues, mechanical failure, or reduced product performance. In sectors such as electronics or aerospace, components must align perfectly with other parts to ensure safety and functionality.
Precision steel fabrication reduces the need for on-site adjustments, improves installation efficiency, and enhances overall structural integrity. Accurate fabrication also minimises material waste and reduces production costs in the long term.
Precision fabrication can involve several types of steel depending on project requirements. Mild steel is commonly used for general fabrication due to its affordability and workability. Stainless steel is chosen for corrosion resistance and hygienic applications.
Galvanised steel is used where rust protection is required. High-strength alloy steels are selected for demanding structural or mechanical applications. Material thickness and grade selection depend on load requirements, environmental conditions, and intended use.
Precision sheet metal fabrication involves multiple carefully controlled processes.
The process begins with detailed digital design using computer-aided design software. Engineers create 3D models and technical drawings that specify dimensions, tolerances, and material types. Digital modelling ensures that designs are optimised before production begins.
Laser cutting is one of the most common techniques in precision fabrication. High-powered lasers cut sheet metal with exceptional accuracy and minimal distortion. This process produces clean edges and intricate shapes. Laser cutting is ideal for complex patterns and detailed designs.
CNC punching machines create holes, slots, and shapes in sheet metal using programmed instructions. The automated system ensures consistent placement and high-speed production. Punching is often used for electrical panels, ventilation holes, and mounting features.
Press brakes and forming machines bend sheet metal into precise angles and shapes. Computer-controlled systems calculate the correct force and positioning to achieve accurate results. Precision bending ensures proper alignment during final assembly.
Precision welding joins sheet metal components with minimal distortion. Techniques such as TIG welding are often used for fine and detailed work. Other joining methods include riveting, bolting, and adhesive bonding, depending on application requirements.
Surface treatments such as powder coating, painting, anodising, or galvanising enhance durability and appearance. Finishing also protects components from corrosion. Precision finishing ensures uniform coating thickness and aesthetic consistency.
Precision sheet metal fabrication supports a wide range of industries. In the electronics industry, it is used to manufacture enclosures for control systems, server cabinets, and protective housings.
In the automotive sector, precision components support engine systems, dashboards, brackets, and structural reinforcements.
In medical equipment manufacturing, sheet metal fabrication creates sterile housings, instrument frames, and protective panels.
In telecommunications, fabricated metal enclosures protect sensitive equipment from environmental exposure.
In construction, precision sheet metal is used for architectural cladding, HVAC ducting, and structural detailing.
Precision steel fabrication offers several benefits.
High accuracy ensures components fit together seamlessly, reducing assembly time and errors.
Automation increases efficiency and production speed while maintaining consistent quality.
Repeatability allows manufacturers to produce identical components in large volumes.
Material optimisation reduces waste and improves cost efficiency.
Enhanced durability ensures long-lasting performance in demanding environments.
Advanced technology plays a crucial role in precision steel fabrication. CNC machines enable programmable control over cutting, punching, and bending processes. Robotic welding systems enhance consistency and reduce human error.
Automated inspection tools measure dimensions and verify compliance with design specifications. Building Information Modelling integrates fabrication data with construction planning, improving coordination. Industry 4.0 technologies enable real-time monitoring of production processes, increasing efficiency and quality control.
Precision fabrication requires rigorous inspection procedures.
Dimensional measurements are verified using digital callipers, coordinate measuring machines, and laser scanners.
Weld quality is assessed through visual inspection and non-destructive testing.
Surface finishes are inspected to ensure uniform coating and corrosion protection.
Quality documentation ensures traceability and compliance with industry standards.
Despite its advantages, precision fabrication presents challenges.
Tight tolerances require advanced equipment and skilled operators.
Material distortion during welding or bending must be carefully managed.
Equipment calibration is essential to maintain accuracy.
Production costs may be higher due to advanced technology and quality control requirements.
However, the long-term benefits of precision often outweigh these challenges.
Precision fabrication contributes to sustainability by minimising material waste through optimised cutting patterns. Efficient manufacturing reduces energy consumption. Steel’s recyclability supports environmentally responsible production practices. Durable precision components reduce replacement frequency and support sustainable infrastructure.
Although automation is integral, skilled professionals remain essential in precision fabrication.
Engineers design accurate models.
Machine operators program CNC equipment.
Certified welders perform fine joining tasks.
Quality inspectors ensure compliance with specifications.
Continuous training ensures workforce competence in advanced fabrication techniques.
What is precision sheet metal fabrication?
Precision sheet metal fabrication is the process of cutting, bending, forming, and assembling thin steel sheets into highly accurate components using advanced computer-controlled machinery and strict quality control standards.
Where is precision sheet metal fabrication commonly used?
It is widely used in industries such as electronics, automotive manufacturing, medical equipment production, telecommunications, HVAC systems, and advanced construction projects.
Why is precision important in sheet metal fabrication?
Precision ensures proper fit, reliable performance, reduced assembly errors, and compliance with engineering requirements, especially in industries where tight tolerances are critical.
Precision steel fabrication represents the evolution of traditional metalworking into a highly controlled, technology-driven process that delivers accuracy, consistency, and reliability. Within this field, precision sheet metal fabrication plays a crucial role in producing lightweight yet durable components used across diverse industries.
By integrating advanced machinery, skilled craftsmanship, and rigorous quality control, precision fabrication meets the growing demand for exact measurements and dependable performance.
As industries continue to innovate and require increasingly complex components, precision steel fabrication will remain essential in supporting technological advancement, industrial efficiency, and modern engineering excellence.
In recent years, technological innovation has transformed the field of aesthetic medicine, particularly in the area of hair removal and skin treatments.
What once required repeated waxing appointments or temporary grooming routines can now be addressed with advanced laser systems designed for long-term results. As clinics promote cutting-edge procedures, many individuals ask an important question: What is advanced laser therapy?
Advanced laser therapy refers to the next generation of laser-based treatments that use refined technology, improved safety mechanisms, customizable settings, and enhanced precision to deliver more effective and comfortable results.
In the context of hair removal, advanced laser systems are engineered to provide efficient hair reduction across various skin tones and hair types while minimising discomfort and downtime.
This comprehensive guide explores Advanced Laser Hair Therapy in depth. It explains how modern laser systems work, what distinguishes advanced platforms from older technologies, who can benefit from them, and what results can realistically be expected.
Before exploring what makes laser therapy “advanced,” it is essential to understand how standard laser hair removal works. Laser systems use focused light energy at specific wavelengths. This light targets melanin, the pigment found in hair follicles.
When the laser light is absorbed by the pigment, it converts into heat. That heat damages the follicle, impairing its ability to produce new hair. Because hair grows in cycles, multiple sessions are required to treat follicles during their active growth phase.
Traditional laser systems were highly effective for individuals with light skin and dark hair, but they had limitations when treating darker skin tones or lighter hair colours. Technological advancements have significantly expanded these capabilities.
Advanced laser therapy is based on a scientific principle called selective photothermolysis. This process allows laser energy to selectively target pigmented hair follicles while minimising damage to surrounding skin.
By adjusting wavelength, pulse duration, and energy levels, practitioners can customise treatments according to individual skin and hair characteristics. Modern systems incorporate refined control mechanisms that enhance both safety and effectiveness.

Advanced laser therapy refers to the use of next-generation laser devices that incorporate improved wavelength precision, cooling technologies, faster treatment speeds, and adaptive settings for diverse skin tones. These systems are designed to enhance results while reducing discomfort and risk.
Unlike earlier technologies, advanced laser platforms are capable of treating a broader range of skin types safely. They offer customizable treatment parameters that allow practitioners to adjust energy levels based on skin sensitivity, hair thickness, and treatment area.
Advanced laser therapy is not limited to hair removal. It can also include skin rejuvenation, pigmentation correction, vascular treatments, and acne management. However, in the context of advanced laser hair therapy, the focus is on long-term hair reduction using enhanced equipment.
Modern advanced laser systems include integrated cooling mechanisms that protect the skin’s surface during treatment. Some devices use contact cooling tips, cryogen spray cooling, or air cooling systems to improve comfort. These platforms often feature multiple wavelength options in a single device, allowing tailored treatment for different skin tones and hair depths.
Advanced laser hair therapy uses refined wavelengths such as 755 nm, 810 nm, and 1064 nm, each designed to target specific hair and skin characteristics. By selecting the appropriate wavelength, practitioners can effectively treat various skin types while minimising side effects.
The laser pulse penetrates the skin and is absorbed by the melanin in the hair shaft. Heat travels down to the follicle, disrupting its ability to regrow hair.
Because only hairs in the active growth phase respond effectively, treatments are spaced several weeks apart to capture follicles at the correct stage.
Most individuals require six to eight sessions for significant hair reduction. Advanced systems often reduce treatment time due to larger spot sizes and faster pulse repetition rates. Results typically become noticeable after a few sessions, with hair regrowth becoming finer and less dense over time.
Advanced laser therapy distinguishes itself through precision, versatility, and enhanced comfort. Traditional laser systems were effective but often required cautious application for darker skin tones. Advanced systems incorporate adaptive energy settings that reduce the risk of pigmentation changes.
Additionally, modern devices allow for quicker sessions, making large areas like legs or back more efficient to treat.
Advanced systems are equipped with real-time skin monitoring and cooling technologies. These features help reduce the risk of burns or irritation. Professional training combined with technological improvements enhances overall treatment safety.
One of the most significant advantages of advanced laser therapy is its ability to treat a diverse range of skin tones safely. Earlier technologies were limited in treating darker complexions due to higher melanin levels in the skin.
Advanced lasers, particularly those with longer wavelengths such as 1064 nm, are better suited for darker skin types because they penetrate deeper while minimising epidermal absorption.
While laser therapy is most effective on dark hair, some advanced systems have improved their ability to address finer hair types. However, extremely light or grey hair may still respond better to alternative methods like electrolysis.
Advanced laser therapy prioritises patient comfort. Integrated cooling systems significantly reduce discomfort during treatment. Many individuals describe the sensation as a mild snapping feeling. Shorter session times also enhance convenience and reduce overall treatment stress. Post-treatment effects such as redness or mild swelling typically resolve within a few hours.
Advanced laser therapy requires little to no downtime. Patients can resume normal activities immediately after treatment. Sun protection and gentle skincare are recommended to protect treated areas.
Advanced laser hair therapy provides long-term hair reduction rather than guaranteed permanent removal of every follicle. Many individuals experience a 70 to 90 per cent reduction in hair density after completing treatment.
Maintenance sessions once or twice a year may be needed due to hormonal changes or activation of dormant follicles. Setting realistic expectations ensures satisfaction with outcomes.
Hormonal fluctuations, such as pregnancy or medical conditions, can stimulate new hair growth. Advanced laser systems can address new growth effectively during maintenance sessions. Understanding biological limitations helps maintain confidence in results.
Advanced laser therapy is generally safe when performed by trained professionals. Temporary redness and mild swelling are common but resolve quickly. Rare complications such as pigmentation changes are minimised with proper equipment and skilled application. Choosing certified practitioners ensures safe and effective treatment.
A consultation assesses skin type, medical history, and treatment goals. Patch testing may be conducted to determine safe energy settings. Personalised treatment planning enhances outcomes.
Advanced laser treatments may involve higher upfront costs due to sophisticated technology. However, long-term reduction reduces ongoing expenses associated with waxing or shaving. Package pricing is often available for multiple sessions. When considering long-term convenience, time savings, and confidence benefits, advanced laser therapy offers strong value.
Calculating the cumulative cost of temporary hair removal methods over several years often highlights the financial practicality of laser therapy. The reduction in daily grooming routines contributes to lifestyle convenience.
What is advanced laser therapy?
Advanced laser therapy refers to next-generation laser treatments that use improved wavelengths, cooling systems, and customizable settings to provide safe and effective hair reduction across diverse skin types.
Is it safe for all skin tones?
Modern advanced laser systems are designed to treat a broad range of skin tones safely when operated by trained professionals.
How many sessions are required?
Most individuals need six to eight sessions spaced several weeks apart for optimal results.
Advanced laser hair therapy represents a significant evolution in aesthetic technology. By incorporating precise wavelength control, enhanced cooling systems, and adaptable treatment settings, advanced laser therapy offers safer, faster, and more effective hair reduction for a wider range of individuals.
While it does not guarantee the complete and permanent removal of every hair follicle, it provides a substantial long-term reduction with minimal downtime and high patient satisfaction. Understanding what advanced laser therapy truly involves allows individuals to make informed decisions and approach treatment with realistic expectations and confidence.
Growing older is a natural part of life, but financial uncertainty does not have to be. Preparing financially for old age requires more than simply saving money; it demands a strategic, long-term approach that accounts for rising living costs, healthcare expenses, inflation, and potential aged care needs.
With longer life expectancy and evolving retirement systems, individuals must plan for decades of post-work living. Financial preparation involves building sustainable income, protecting assets, planning for healthcare, structuring investments appropriately, and implementing clear aged care funding strategies.
In this article, you will learn how to prepare financially for old age, explore practical retirement planning methods, and understand effective strategies for aged care financial planning that can safeguard both your independence and your family’s financial legacy. If you want to know more about financial planning, click on Tailored Aged Care Strategies.

One of the most important aspects of preparation is recognising what retirement truly looks like financially. Retirement today can last 20 to 30 years or longer. This means your savings must support you for potentially one-third of your lifetime.
While certain expenses, such as commuting or professional attire, may decrease, others tend to rise. Healthcare costs typically increase with age, and you may need to budget for home modifications, mobility aids, or in-home assistance. Inflation compounds these pressures over time, gradually eroding purchasing power. Even a modest annual inflation rate can significantly increase living costs over decades.
Understanding these realities allows you to calculate realistic retirement goals rather than relying on rough estimates.
Retirement savings are the cornerstone of financial independence in old age. The earlier you begin saving, the more you benefit from compound growth.
Making regular contributions to retirement accounts helps build discipline and momentum. Even small, consistent deposits can accumulate substantially over time due to the power of compounding returns. Automating contributions reduces the temptation to skip payments.
If your employer offers retirement contributions or matching programs, taking full advantage of these benefits significantly accelerates savings growth. Employer matches are essentially free money that can dramatically increase long-term wealth.
Diversifying across asset classes such as equities, fixed income, and property reduces risk exposure. A well-diversified portfolio helps smooth market volatility while maintaining the growth potential necessary for long-term retirement security.
Strong retirement savings reduce reliance on government benefits and provide greater flexibility when planning for aged care.
Accumulating assets is only the first step. Converting those assets into reliable income is equally critical.
A systematic withdrawal plan ensures that you draw income at a sustainable rate. Withdrawing too aggressively in early retirement can deplete savings prematurely, while being overly conservative may unnecessarily restrict lifestyle choices.
Understanding eligibility criteria for public pension systems is essential. Strategic timing of benefit claims can significantly influence lifetime income. Proper planning ensures you maximise entitlements without unintentionally reducing eligibility.
Some retirees consider annuities or similar financial products that provide predictable income streams. While these products may limit liquidity, they can provide peace of mind through guaranteed payments. Balancing flexibility with predictability is key to maintaining financial stability throughout retirement.
Carrying significant debt into retirement can strain limited income streams. Reducing liabilities before leaving the workforce improves cash flow and lowers financial stress.
Paying off high-interest consumer debt should be a priority, as interest payments reduce available funds for retirement living expenses. Mortgage repayment strategies should also align with retirement goals. Entering retirement debt-free provides greater financial security and resilience during economic downturns. Eliminating debt enhances the effectiveness of retirement income planning.
Insurance serves as a financial safeguard against unexpected events that could otherwise erode savings.
Medical expenses are one of the largest financial risks in old age. Adequate health insurance helps manage hospital bills, specialist fees, and medication costs.
Long-term care insurance can help cover the cost of in-home care, assisted living, or residential aged care facilities. Without coverage, these expenses may quickly deplete retirement savings.
While life insurance needs may decrease later in life, it can still support dependents or cover final expenses. Disability or income protection insurance is more relevant during working years, but contributes to overall long-term stability. Insurance planning reduces the likelihood of financial disruption from unforeseen circumstances.
Healthcare spending often rises with age, and it is important to plan accordingly. Routine checkups, prescription medications, dental care, and specialist treatments can accumulate high costs over time. Setting aside a dedicated healthcare fund provides additional security beyond standard insurance coverage.
Investing in preventive healthcare may also reduce long-term expenses. Maintaining a healthy lifestyle can delay or minimise medical interventions, preserving both financial and personal well-being.
Financial preparation for old age includes protecting how your wealth will be distributed.
Keeping wills updated ensures that assets are transferred according to your wishes. Clear documentation prevents family disputes and simplifies estate administration.
Appointing trusted individuals to make financial and medical decisions protects your interests if you become incapacitated.
In some situations, trusts can offer tax efficiency and asset protection benefits. However, they must be carefully structured to comply with regulations. Comprehensive estate planning provides clarity and security for future generations.
Aged care planning is an increasingly important component of retirement strategy. As health needs evolve, individuals may require in-home support or residential aged care services.
Aged care may include home-based assistance, community programs, or residential facilities. Each option involves distinct financial obligations, and understanding these early allows better preparation. Home care may provide independence but involves ongoing service fees. Residential care often requires accommodation payments and daily charges.
Residential aged care facilities may require lump-sum accommodation deposits or daily payment alternatives. Choosing between these options depends on liquidity, asset allocation, and estate planning objectives.
The family home is often a major asset in retirement. Decisions regarding selling, renting, or retaining the property can significantly affect aged care funding and government benefit eligibility. Careful financial modelling ensures that choices support both immediate care needs and long-term wealth preservation.
Government assistance for aged care is often influenced by income and asset assessments. Strategic financial structuring can help optimise eligibility while maintaining compliance. Professional advice may be especially beneficial when navigating these complex regulations.
Unexpected expenses do not disappear in retirement. Maintaining a liquid emergency reserve prevents the need to sell long-term investments during unfavourable market conditions. An emergency fund provides financial confidence and flexibility, particularly during economic downturns.
As individuals age, risk tolerance often shifts. Gradually reallocating investments toward income-generating and lower-volatility assets helps protect accumulated wealth. However, maintaining some growth-oriented investments is important to counter inflation and support long-term purchasing power. A balanced portfolio reflects both income needs and longevity risk.
Inflation can significantly reduce the value of fixed-income streams. Including assets with growth potential or inflation-linked characteristics can preserve purchasing power. Regular financial reviews help adjust spending and investment strategies to match changing economic conditions.
Retirement and aged care planning involve multiple moving parts, including tax considerations, asset assessments, and income structuring.
A qualified financial adviser can provide scenario modelling, optimise withdrawal strategies, and assist with aged care funding decisions. Even individuals confident in managing their investments may benefit from professional oversight during complex life transitions.
Expert guidance often prevents costly mistakes and enhances long-term outcomes.
When should I begin planning for old age?
Ideally, as early as possible, since compound growth significantly benefits long-term savings. However, meaningful improvements can be made at any stage of life.
How can I estimate my retirement income needs?
Start by calculating expected living expenses, healthcare costs, and lifestyle goals, then adjust for inflation and longevity.
Is aged care planning necessary if I am still healthy?
Yes. Planning early provides flexibility and allows strategic asset structuring before urgent decisions are required.
Preparing financially for old age is a comprehensive, long-term process that requires discipline, foresight, and adaptability. By building strong retirement savings, creating sustainable income streams, protecting assets with insurance, planning for healthcare costs, and implementing strategic aged care financial planning, you can secure comfort and independence in later life.
Financial preparation not only safeguards your lifestyle but also reduces stress for your loved ones. Aging is inevitable, but with thoughtful planning and informed decisions, you can approach it with stability, dignity, and lasting peace of mind.
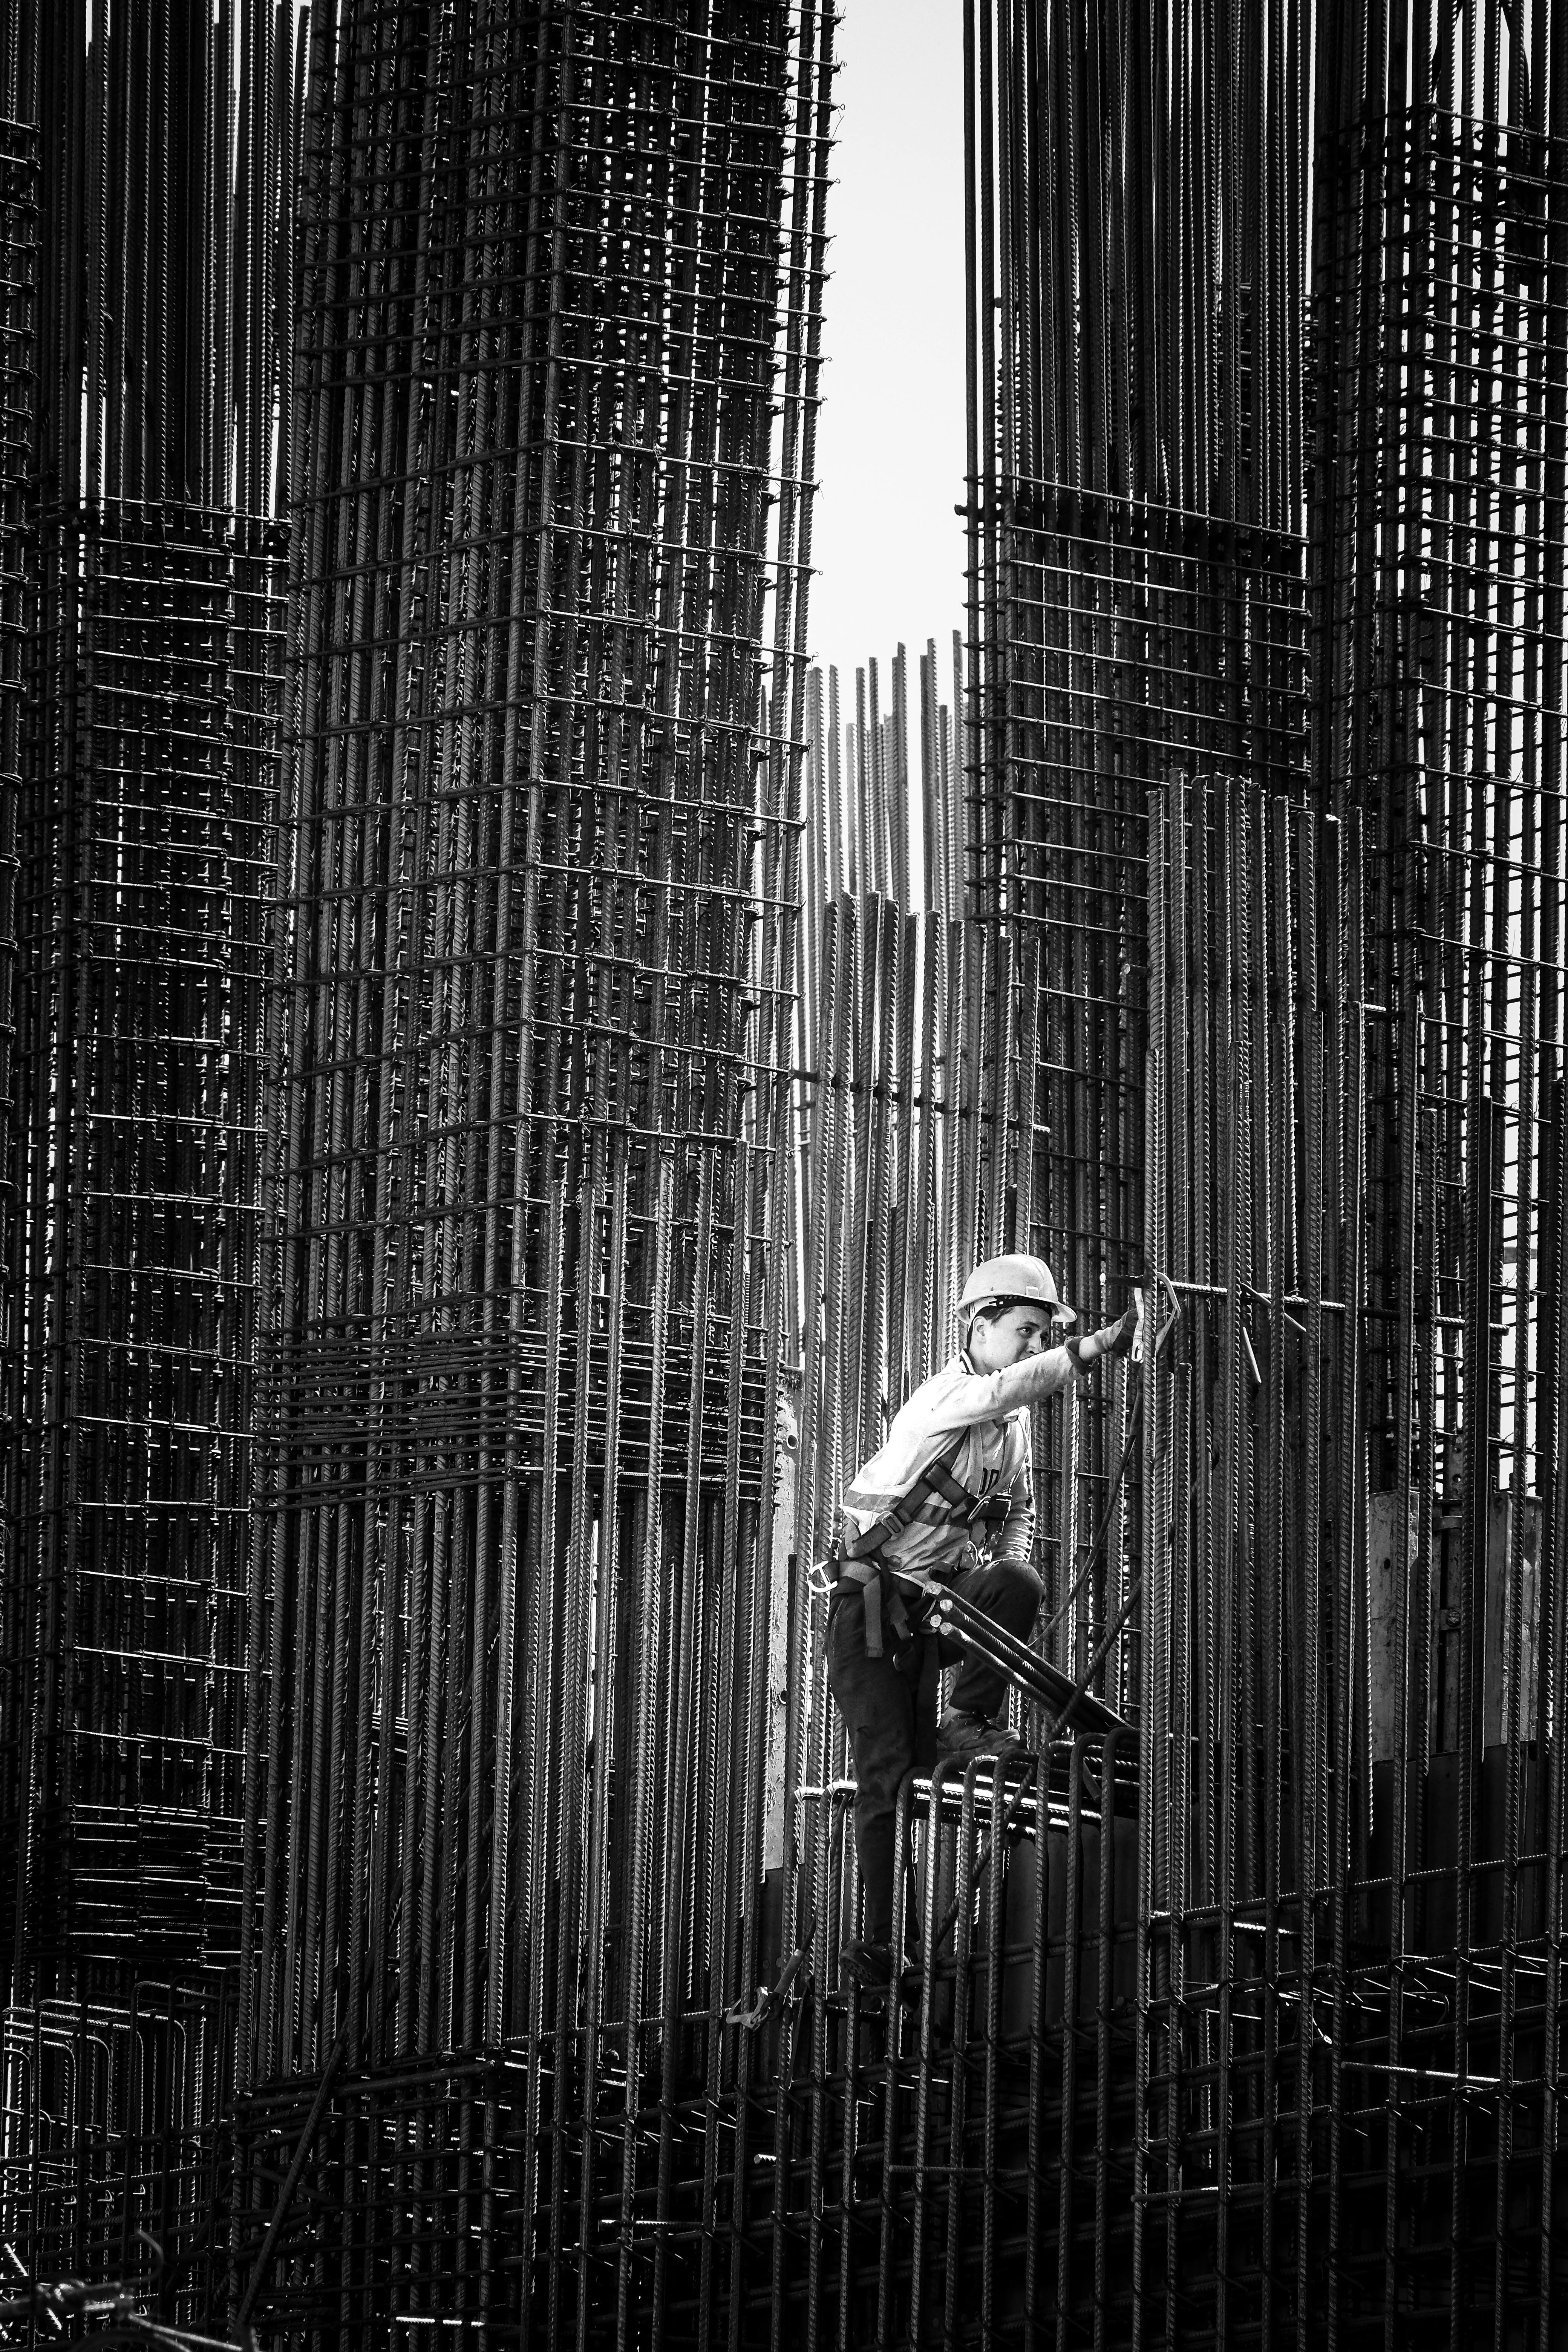
In contemporary construction, material selection defines not only the structural strength of a building but also its durability, safety, and long-term value. Among the most recognised steel products in Australian residential and light commercial construction is BlueScope Truecore steel.
Frequently specified for wall frames, roof trusses, and structural components, this engineered steel product has earned a reputation for reliability and performance. Yet one of the most common and important questions asked by builders, designers, and property owners is straightforward: What is Truecore steel made of?
Understanding the composition of BlueScope Truecore Steel requires more than simply identifying its base metal. It involves examining the core steel substrate, the protective metallic coating, the manufacturing process, and the metallurgical properties that contribute to its strength and durability.
This comprehensive guide explores the material composition of BlueScope Truecore steel, its structural characteristics, its corrosion resistance, and why it continues to play a critical role in modern steel framing systems.
BlueScope is a global steel manufacturer headquartered in Australia, widely known for producing high-quality coated and painted steel products. Within its portfolio, Truecore steel was specifically developed to meet the demands of residential and light commercial framing applications.
Truecore steel is designed primarily for use in structural wall frames and roof trusses. It provides a lightweight yet strong alternative to traditional timber framing. The product was engineered to deliver consistent mechanical performance, dimensional stability, and long-term resistance to corrosion under normal internal building conditions.
The innovation behind Truecore steel lies in its carefully controlled composition and protective coating system, which together create a durable structural material suitable for engineered framing.
At its core, Truecore steel consists of a high-strength cold-rolled steel substrate coated with a corrosion-resistant metallic alloy known as aluminium-zinc (commonly referred to as AZ coating).
The base steel is a low-carbon structural steel formulated for strength, ductility, and forming capability. The steel substrate is then coated with an aluminium-zinc alloy that typically contains approximately 55 per cent aluminium, 43.5 per cent zinc, and 1.5 per cent silicon. This metallic coating provides enhanced corrosion resistance compared to conventional galvanised steel.
Therefore, Truecore steel is made of two essential components: a high-strength structural steel core and a protective aluminium-zinc metallic coating bonded to both sides of the steel strip.
The steel substrate used in Truecore is engineered for structural framing. It is typically manufactured to meet specific mechanical property standards that define yield strength and tensile strength. These properties ensure that the steel can safely carry loads in wall and roof framing systems.
The steel core undergoes cold-rolling during production. Cold-rolling refines the grain structure of the steel and enhances its strength and surface finish. This process improves dimensional accuracy, which is critical for prefabricated framing components.
The carbon content of the steel is carefully controlled. Low-carbon steel offers excellent ductility, meaning it can be formed into various shapes without cracking. This characteristic is essential for roll-forming processes used to create studs, tracks, and truss members.
The result is a steel core that provides structural integrity while remaining workable during manufacturing and installation.
The aluminium-zinc coating applied to Truecore steel is one of its defining features. Unlike traditional galvanised coatings that rely solely on zinc, the aluminium-zinc alloy combines the benefits of both metals.
Aluminium provides barrier protection by forming a stable oxide layer that slows corrosion. Zinc offers sacrificial protection, meaning it corrodes preferentially to protect the steel substrate if the coating is damaged.
The inclusion of silicon enhances adhesion between the coating and the steel surface, improving coating durability during forming operations. This protective layer significantly extends the lifespan of the steel when used in dry internal environments typical of residential framing.
The production of Truecore steel begins with hot-rolled steel coils that are pickled to remove scale and impurities. The steel is then cold-rolled to achieve precise thickness and mechanical properties.
After cold-rolling, the steel strip passes through a continuous hot-dip coating line. In this process, the steel is submerged in a molten bath of aluminium-zinc alloy. The coating bonds metallurgically to the steel surface.
The thickness of the coating is carefully controlled to meet performance standards. Once coated, the steel is cooled and recoiled for delivery to roll-forming manufacturers. This controlled manufacturing process ensures consistent material properties across batches.
Truecore steel is designed to meet structural performance requirements for framing applications. It typically exhibits high yield strength, often in the range of 450 MPa or higher, depending on product specifications. High yield strength allows framing members to resist deformation under load. Tensile strength ensures the material can withstand pulling forces without failure.
Additionally, the steel’s modulus of elasticity contributes to stiffness, enabling structural members to maintain shape under service loads. These mechanical properties make Truecore steel suitable for engineered framing systems that comply with building codes and standards.
Truecore steel is primarily used in wall framing and roof trusses. Steel studs and tracks formed from Truecore provide structural support for plasterboard, cladding, insulation, and roofing materials. In roof truss systems, Truecore steel enables precise fabrication of load-bearing components that distribute roof loads evenly.
The lightweight nature of steel framing simplifies transportation and installation while maintaining structural capacity. Truecore steel framing systems are particularly beneficial in regions prone to termites, high humidity, and bushfire risk.
One significant advantage of Truecore steel is its resistance to termites and other biological threats. Unlike timber, steel does not provide a food source for pests.
This resistance reduces the need for chemical treatments and ongoing pest management. For homeowners in termite-prone regions, steel framing offers long-term structural security. The non-organic composition of steel eliminates concerns related to rot, mould growth, or fungal decay.
Timber framing can shrink, warp, or twist due to moisture fluctuations. In contrast, Truecore steel maintains consistent dimensions over time. This stability improves wall alignment and reduces issues such as plasterboard cracking.
Precision manufacturing ensures consistent stud spacing and straightness, which enhances installation efficiency and finish quality. Dimensional stability contributes significantly to long-term building performance.
Steel is non-combustible and does not contribute fuel to a fire. While steel can lose strength at elevated temperatures, appropriate fire-rated wall systems protect framing members during fire exposure. In bushfire-prone areas, steel framing reduces fire load within the structure. The non-combustible nature of Truecore steel enhances safety and compliance with fire regulations.
Steel is highly recyclable. Truecore steel may contain recycled content, and at the end of a building’s life, steel framing can be recovered and reused. Recycling steel requires less energy than producing new steel from raw iron ore.
Additionally, steel framing systems generate minimal on-site waste due to precision manufacturing. The long lifespan of steel framing supports sustainable construction practices.
Traditional galvanised steel uses a pure zinc coating for corrosion protection. While effective, galvanised coatings may offer lower long-term corrosion resistance compared to aluminium-zinc coatings. Truecore’s aluminium-zinc coating provides improved barrier protection and slower corrosion rates in dry environments. This enhanced performance contributes to greater durability in framing applications.
Truecore steel is manufactured under strict quality control systems. Mechanical properties, coating thickness, and dimensional tolerances are monitored during production.
Compliance with relevant Australian Standards ensures suitability for structural framing. Manufacturers of steel framing components must also adhere to engineering design requirements. Quality assurance provides confidence to builders and homeowners.
What is Truecore steel made of?
Truecore steel is made of a high-strength cold-rolled steel core coated with an aluminium-zinc alloy that provides corrosion resistance.
Is Truecore steel galvanised?
Truecore steel uses an aluminium-zinc coating rather than traditional pure zinc galvanising, offering enhanced corrosion protection.
Can Truecore steel rust?
Under normal internal building conditions, the aluminium-zinc coating provides long-term corrosion resistance. However, exposure to highly corrosive environments may require additional protection.
BlueScope Truecore steel represents a carefully engineered combination of structural strength and corrosion protection. Composed of a high-strength cold-rolled steel core and an advanced aluminium-zinc metallic coating, it delivers durability, dimensional stability, and resistance to environmental threats.
When asking, What is Truecore steel made of? The answer extends beyond steel alone. It is the integration of metallurgical precision, protective alloy technology, and controlled manufacturing processes that defines its performance.
In residential and light commercial framing, Truecore steel continues to provide a reliable, sustainable, and structurally sound alternative to traditional materials. Through its composition and design, it stands as a benchmark for modern steel framing solutions, offering confidence and longevity in contemporary construction.
Cosmetic tattoo treatments have become an efficient solution for individuals looking to simplify their daily routines. Whether you’re aiming to restore the shape of your brows, define your eyes, or enhance your lip tone, cosmetic tattooing offers practical options that reduce the need for constant makeup application.
These treatments not only save time every day but also support a neat and consistent appearance. If you’re unsure where to begin, readingEyebrow tattoo reviews Melbourne can help you choose the right professional and style for your needs.

Cosmetic tattooing, also known as micropigmentation, involves implanting pigment into the skin’s upper layers. Technicians use specialised devices or manual tools to deposit colour, creating the appearance of makeup. The result is semi-permanent and fades gradually over time.
Cosmetic tattoo treatments are most commonly applied to eyebrows, eyes, and lips. Each area is treated using specific methods designed to suit individual skin types and facial features. The goal is to create natural-looking enhancements that complement your appearance rather than overpower it.
Cosmetic eyebrow tattooing is one of the most requested treatments for saving time. Many people spend a considerable part of their morning drawing or filling in their brows. With tattooing, brows remain defined and balanced from the moment you wake up.
Techniques include microblading, where fine hair-like strokes are manually created, powder brows which deliver a shaded effect, and combination brows that incorporate both methods. Each option is tailored based on your desired outcome, skin texture, and existing hair growth.
Tattooing along the lash line can replace the daily effort of applying eyeliner. This treatment is especially helpful for those with busy mornings, unsteady hands, or makeup allergies. Lash enhancement is a popular style that adds subtle definition without appearing overly made-up. There are also bolder options for clients who prefer a more noticeable line.
Once healed, eyeliner tattoos provide clean, smudge-free definition that holds up through humidity, exercise, and water.
Lip tattooing, also known as lip blushing, enhances the colour and shape of the lips. The process helps correct uneven pigmentation and adds a healthy tint that lasts. This means no more constant reapplication of lip colour throughout the day. Soft shades are selected based on your natural skin tone, ensuring a flattering result that doesn’t appear overly bold.
For clients who feel their lips have lost definition with age or want a more balanced shape, lip blushing offers a low-maintenance solution.
The most noticeable benefit of these treatments is how much time they save. There’s no need to spend 10 to 15 minutes perfecting each brow stroke or reapplying lipstick after meals. Cosmetic tattooing simplifies your daily grooming routine and reduces the number of products needed.
Depending on your skin type, lifestyle, and the pigments used, results can last between one and five years. With appropriate care, cosmetic tattoos remain neat and balanced, avoiding the patchy or smudged look often caused by regular makeup.
For many, cosmetic tattooing helps address issues like uneven brows, pale lips, or sparse lashes. Having consistent definition in these areas can improve how you feel throughout the day, especially when makeup isn’t an option.
Unlike traditional makeup, which can smear or wear off, cosmetic tattooing holds up in nearly all conditions. Whether you’re heading to the gym, swimming, or walking through rain, the pigment stays in place without the need for touch-ups.
The first step is always a consultation. During this appointment, the technician assesses your skin, listens to your preferences, and creates a treatment plan. A temporary design may be drawn on your skin to show what the final result will look like.
Before starting, a topical numbing agent is applied to reduce discomfort. Most clients describe the sensation as light scratching or tingling. Sessions usually take between one to three hours, depending on the area and complexity.
The healing process generally lasts one to two weeks. During this time, the treated area may appear darker and will likely experience mild flaking or scabbing. Aftercare instructions include keeping the area clean, avoiding heavy sweating, and staying out of the sun. A follow-up session is often scheduled six to eight weeks later to reinforce pigment and adjust shape or colour.
If your schedule includes early mornings, exercise, or long workdays, cosmetic tattooing eliminates the need to stop and reapply makeup. You’ll wake up with your features already defined and ready for the day ahead.
Cosmetic tattooing is a good alternative for people who react to traditional makeup. Once healed, the pigment does not irritate the skin and reduces the need for daily products.
If you’ve experienced thinning brows, patchy lip tone, or missing lashes, cosmetic tattooing can restore balance and symmetry. This is also a helpful option for people with medical conditions such as alopecia or trichotillomania.
Sunlight can cause pigments to fade faster. It’s recommended to wear sunscreen and a hat, especially during summer. Keeping the treated area protected helps maintain colour intensity for a longer period.
After your tattoo has fully healed, avoid using exfoliating acids or retinol directly on the pigmented area. These products can accelerate fading. Use gentle cleansers and moisturisers around the tattooed skin to preserve results.
To maintain a clean and balanced look, most technicians suggest touch-ups every 12 to 24 months. These sessions help refresh pigment, make small corrections, and adjust shape if needed.
Choosing a licensed and trained technician is essential. They should have certification in cosmetic tattooing and follow all local hygiene standards. Don’t hesitate to ask about their training and professional background.
Looking at photos of previous clients can help you decide if their style matches your preference. A good technician will be transparent about their process and results.
Studios must follow hygiene guidelines. Tools should be sterilised, and gloves worn during the entire procedure. Single-use needles should be opened in front of the client. If a studio doesn’t meet these standards, it’s best to look elsewhere.
Most cosmetic tattoos last between one to five years. Factors such as sun exposure, skincare habits, and skin type affect how long the pigment remains visible. Regular touch-ups can help extend the appearance.
Thanks to numbing cream, most people find the procedure only mildly uncomfortable. The feeling is often described as similar to light scratching. Any discomfort usually fades quickly once the session is finished.
Once the tattoo has fully healed, you can wear makeup over it if you choose. Many people enjoy not having to apply makeup daily, but it’s still safe to do so for special occasions.
Cosmetic tattoo treatments that save time every day are a practical option for anyone wanting a low-maintenance way to maintain a groomed appearance. Whether it’s tattooed brows, eyeliner, or lip colour, these procedures provide consistent results that stand up to busy schedules and varied conditions.
If you’re looking for long-lasting solutions and a simpler routine, cosmetic tattooing offers real benefits. Begin by reading eyebrow tattoo reviews Melbourne to find experienced professionals and make an informed decision about the right treatment for you.
Cosmetic brow treatments have grown in popularity, with more people seeking natural-looking, low-maintenance solutions to frame their face. Among the most common options are microblading and traditional eyebrow tattooing. While both aim to improve brow definition and fullness, the techniques differ in application, appearance, and long-term outcomes.
This article offers eyebrow microblading vs traditional tattooing explained in detail, helping clients make an informed choice for their face, lifestyle, and skin type. As many explore cosmetic tattooing for eyes as well, services like permanent eyeliner Melbourne professionals offer often complement brow work with similarly lasting results.

Eyebrow microblading uses a manual handheld tool with fine needles to create hair-like strokes by depositing pigment into the skin. The tool allows the technician to mimic natural brow hairs, giving the illusion of texture and volume. The pigment is inserted into the upper layers of the skin, which results in a softer, semi-permanent effect that gradually fades over time.
Microblading suits those with patchy, thin or uneven brows who want subtle enhancement. It’s ideal for clients who prefer a natural appearance and are prepared for periodic touch-ups. Skin type also plays a role, as dry to normal skin retains the strokes better than oily skin.
Traditional eyebrow tattooing is done using a machine similar to those used in body tattoos. It implants ink deeper into the dermis, creating a more defined and often solid appearance. The result is longer lasting, but the style tends to be more saturated and less natural in comparison to microblading.
Clients seeking a bolder, filled-in brow or those with oily skin may lean towards traditional tattooing. This method withstands fading more effectively and requires fewer touch-ups. It can be a good option for those who want lasting definition with minimal maintenance.
The main appeal of microblading lies in its hair-like strokes. Each mark mimics the look of real hair, which makes it ideal for achieving a natural result. These strokes blend with existing brow hairs and help reshape or rebuild sparse areas.
Eyebrow tattooing creates a shaded or filled-in appearance. The pigment tends to appear more like makeup than natural hair. While modern tattooing techniques can be adjusted for softness, the overall effect is usually more bold and uniform than microblading.
Microblading generally lasts between one to two years. As the pigment is placed closer to the surface of the skin, it fades gradually. Factors such as sun exposure, skincare products, and skin type affect how quickly the colour lightens. Touch-ups are often required annually to maintain shape and depth.
Traditional tattooing penetrates deeper into the skin, allowing pigment to remain for several years. While fading still occurs, it happens more slowly. Some clients may need only occasional refresh sessions over a longer span. This durability appeals to those wanting minimal upkeep.
Healing after microblading takes about four to six weeks. In the first week, the brows may appear darker and experience flaking or light scabbing. Some areas may fade unevenly until the pigment settles. After this phase, a touch-up appointment is scheduled to fine-tune the shape and fill in any gaps.
The healing process for traditional eyebrow tattoos is similar but may take slightly longer due to the deeper application. The area might feel more sensitive, and swelling or redness can occur. It is important to follow aftercare guidelines to avoid infection and promote even pigment retention.
Due to the semi-permanent nature of microblading, clients are usually advised to return every 12 to 18 months for touch-ups. This maintains the crispness of the strokes and keeps the brows looking defined. Over time, without maintenance, the strokes may fade into a light haze.
Traditional tattooing doesn’t require as many follow-up visits. Touch-ups may still be needed every few years, but the base colour and shape remain visible for much longer. This option suits those with busy schedules who prefer a longer-term solution.
During microblading, clients often report a scratching or tingling sensation. Numbing cream is applied beforehand to reduce discomfort. The procedure is generally well tolerated and less intense than traditional tattooing due to the shallower pigment placement.
Traditional eyebrow tattooing may feel more like a vibrating pressure or prickling due to the use of a machine. The technician will still apply anaesthetic to manage discomfort, but the sensation is typically stronger than with manual methods.
Clients with normal to dry skin usually experience better pigment retention with microblading. Oily skin tends to push the pigment out more quickly, causing the strokes to blur or fade faster. For these clients, alternative techniques may offer better outcomes.
Those with oilier or mature skin may benefit from the durability of traditional tattooing. The deeper pigment placement holds better in such conditions, and the risk of stroke blurring is lower. Artists often adjust techniques to match the skin’s needs.
One advantage of microblading is that its fading allows clients to adjust shape or style over time. As preferences change, the brows can be redefined at future appointments. This flexibility appeals to those who want to update their look without full removal.
Due to the depth and permanence of traditional tattooing, changes are more difficult to make. While some adjustments can be made through laser removal or colour correction, it’s less straightforward than with microblading. Clients should be sure of their preferred shape and style before committing.
Whether choosing microblading or tattooing, safety comes down to proper technique and hygiene. Artists should use sterile tools, wear gloves, and work in a clean environment. Choosing a certified and experienced professional ensures a lower risk of infection, uneven application, or pigment migration.
Both treatments carry mild risks such as swelling, redness, or allergic reaction. Patch tests may be offered beforehand to test pigment compatibility. Following aftercare instructions strictly reduces the risk of complications and supports proper healing.
Sensitive skin can react to either method, but microblading is often gentler due to its manual application and shallow depth. A consultation with a technician helps assess the best approach based on your skin history and concerns.
Yes, clients often start with microblading and later choose traditional tattooing for longer-lasting results. It’s important to allow the pigment to fade before switching techniques, so the new application sits clearly and evenly.
Both methods can produce natural-looking results when done by a skilled technician. Microblading offers a hair-stroke finish, while newer tattooing techniques have advanced to include softer shading. The final look depends on your chosen style, pigment, and the artist’s experience.
Understanding eyebrow microblading vs traditional tattooing explained helps clients make confident decisions based on appearance goals, skin type, and lifestyle. Microblading appeals to those seeking a soft, natural result with flexibility, while traditional tattooing suits clients wanting a more durable, defined brow with fewer follow-ups.
Both methods have their place in modern cosmetic tattooing, and the right choice depends on individual needs. Paired with other services such as permanent eyeliner Melbourne professionals offer, clients can enjoy a refined, low-maintenance look that lasts. By selecting an experienced technician and following aftercare carefully, you can achieve the brow shape and style that fits your face and routine perfectly.
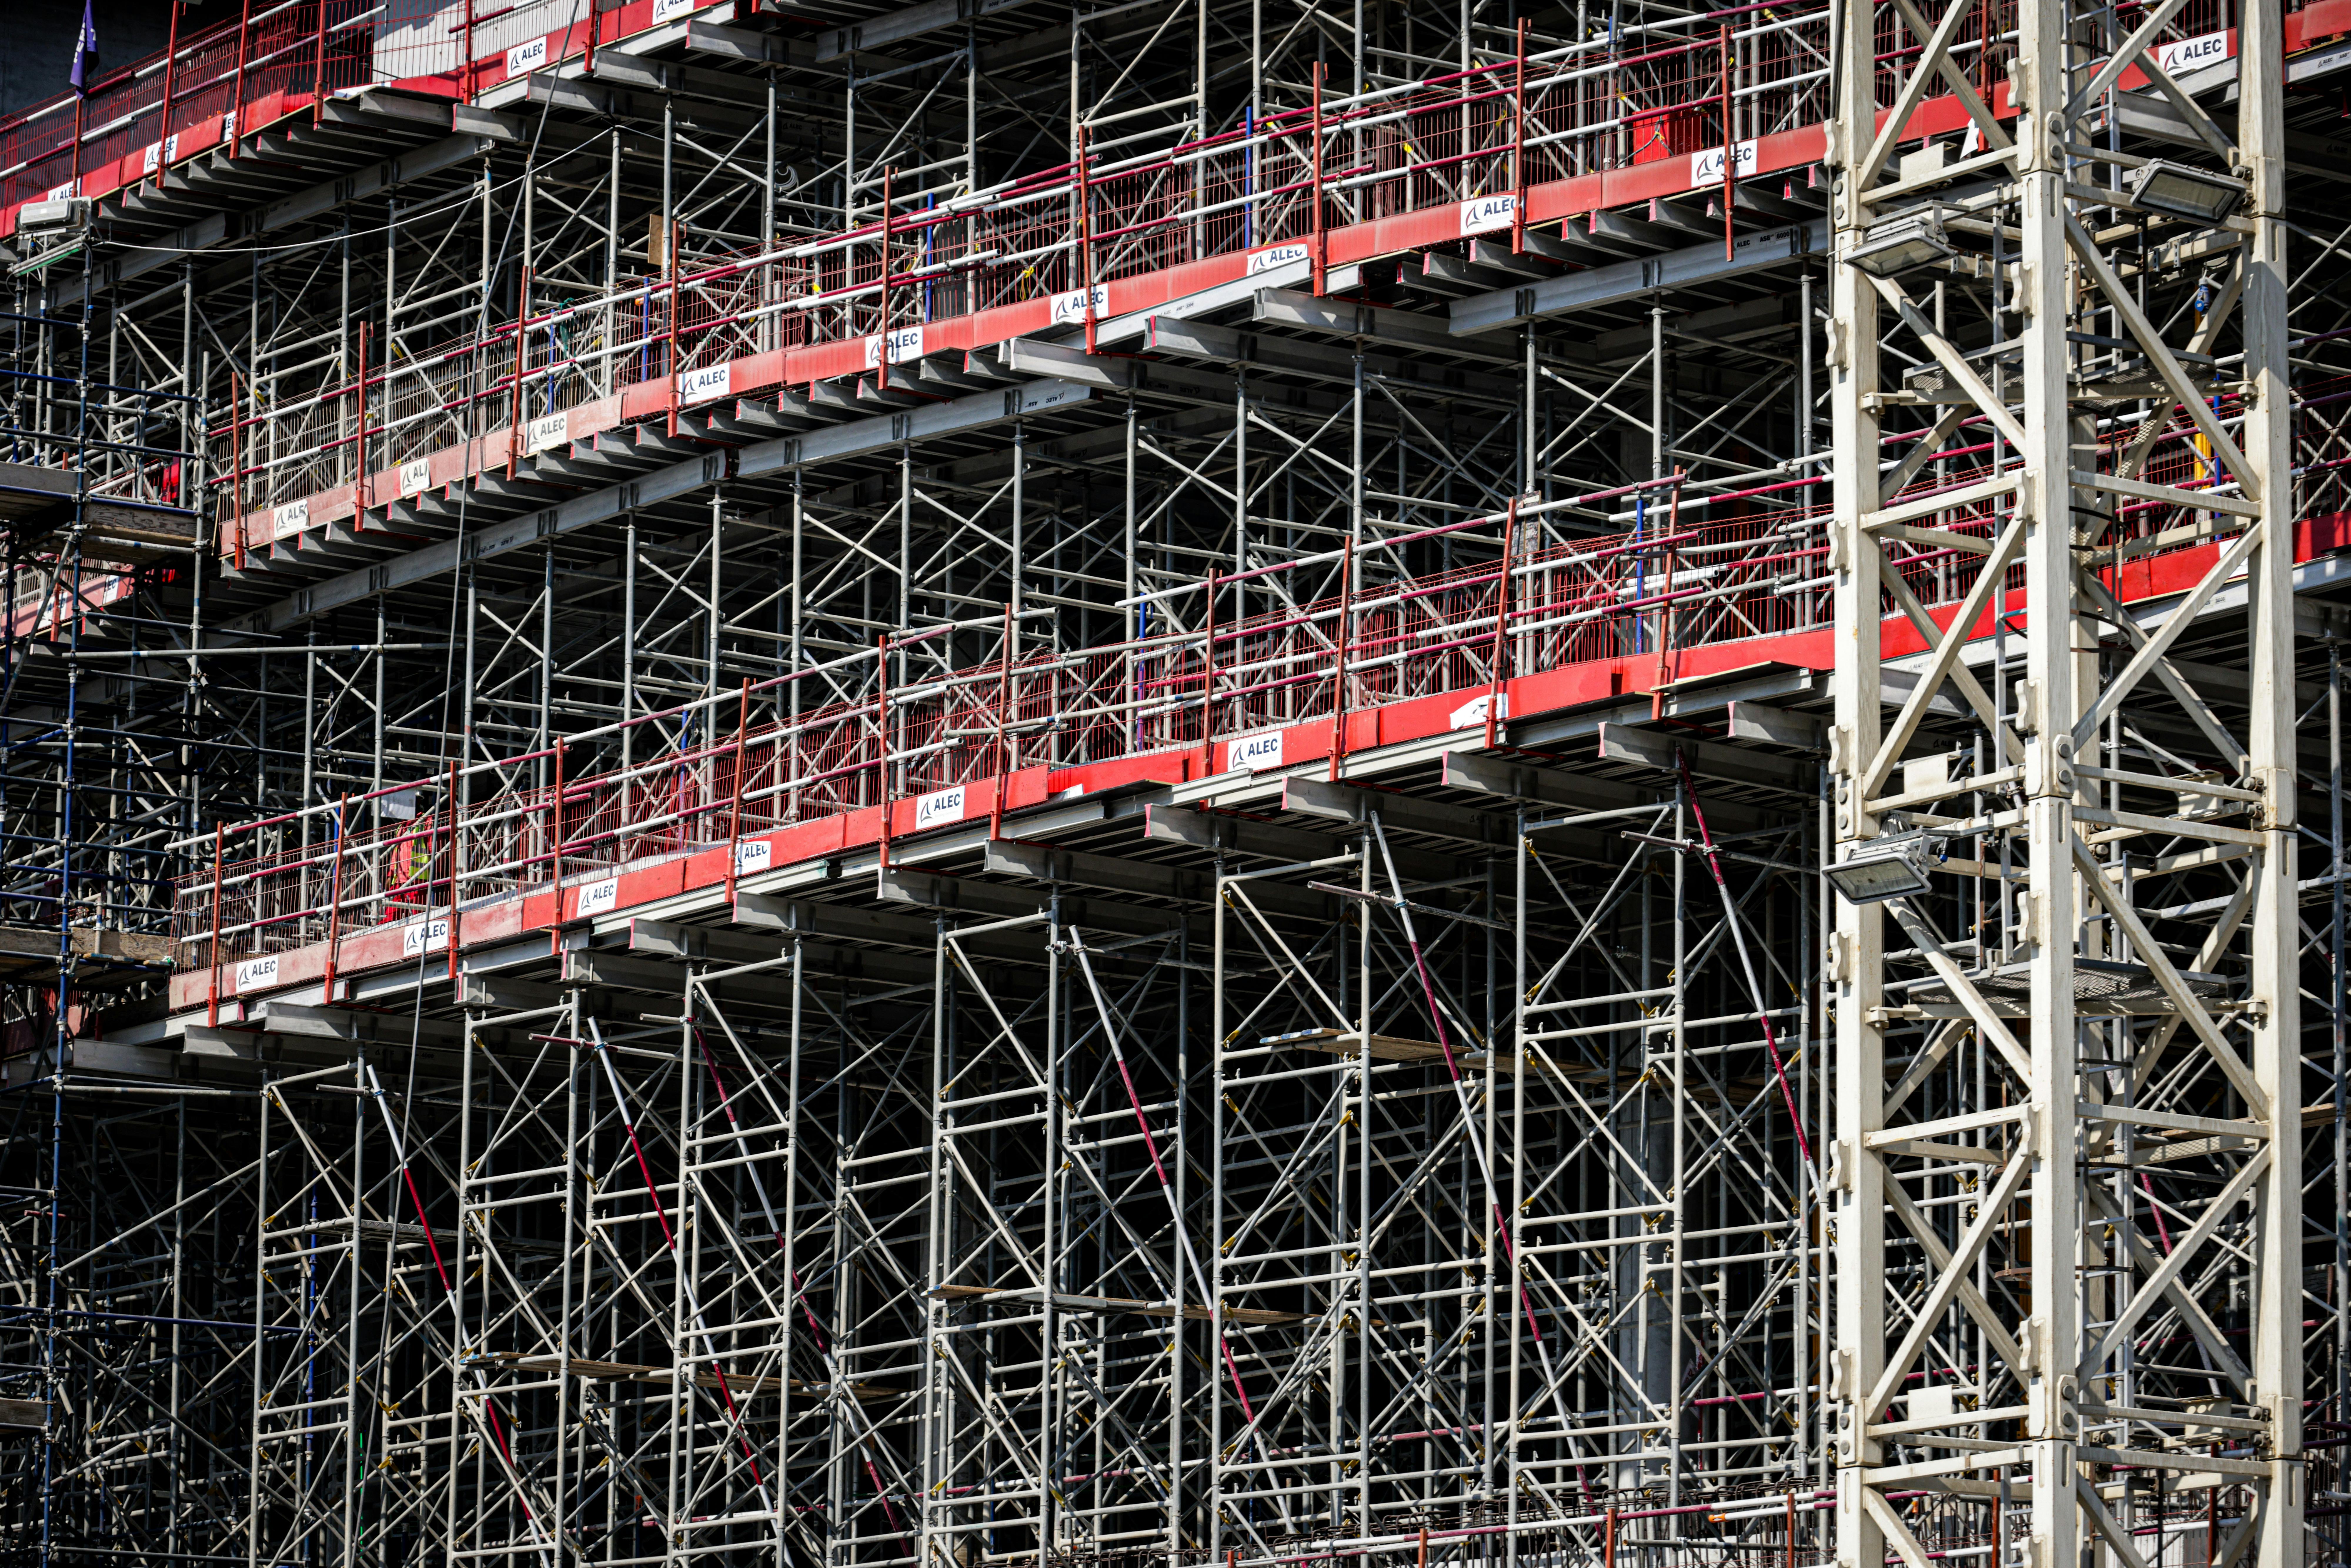
The demand for fast turnaround steel framing solutions in Melbourne has grown significantly in recent years. With tighter build schedules, cost pressures, and a shift toward more efficient construction methods, developers and builders are turning to cold-formed steel as a faster, more predictable option.
Whether it’s a residential home, townhouse project or commercial facility, speed and precision are now just as vital as structural strength.
Many builders are choosing prefabricated wall frames to reduce onsite labour, minimise weather delays, and streamline the overall building timeline. Manufactured offsite and delivered ready for installation, these systems contribute to smoother construction processes, particularly in fast-paced Melbourne developments where time is critical.
Steel framing providers in Melbourne have adapted to market needs by offering faster manufacturing and delivery cycles. With the city’s housing sector under pressure to deliver more homes more quickly, framing solutions must match the tempo of modern projects.
Manufacturers have invested in automation, design software and logistics systems to shorten lead times. This benefits builders working across residential, mixed-use and low-rise commercial projects where every day saved contributes to better project outcomes.
Weather-related disruptions and material shortages are common problems on traditional builds. Fast turnaround steel framing addresses these risks by shifting much of the work off-site. The framing is manufactured in controlled environments, where precision and speed are maintained regardless of external conditions.
This process minimises wet weather stoppages and material inconsistencies, allowing builders to keep sites running efficiently even during Melbourne’s unpredictable weather.
Many Melbourne developments involve repetitive housing designs—such as dual occupancies, townhouses or volume-built homes. Steel framing suits these layouts perfectly. Once the design is approved, multiple sets of the same framing system can be manufactured with identical specifications, ensuring consistency across every unit.
This repeatability allows for better cost control, simplified installation and faster progress across multi-dwelling projects.
By using automated design and production methods, steel frame suppliers are now able to reduce the time from order to delivery. Some systems are turned around within days, depending on the size and complexity of the build.
This allows builders to plan site activity more accurately and reduce downtime between stages, which can often occur when framing takes longer than expected to arrive.
Prefabricated steel systems are designed for quick installation. Components are pre-cut, pre-punched and labelled, eliminating the need for on-site measuring or adjustments. Teams can assemble frames using basic tools, with fewer specialist trades required.
In a market where skilled labour shortages are common, being able to rely on quick assembly methods supports tighter scheduling and fewer delays.
Steel framing systems reduce on-site waste by providing components that are ready for installation. With less material to cut and fewer offcuts to manage, sites remain cleaner and safer. This supports better workflow and reduces the likelihood of safety incidents caused by cluttered work areas or excessive waste.
In urban or infill sites where access and space are limited, this cleaner approach is especially valuable.
Prefabricated wall frames form the core of many steel framing systems. These units are delivered as flat-packed or partially assembled panels, ready to stand into place. Designed to fit window and door openings precisely, they reduce the time needed to complete the external and internal walls of a structure.
Wall frames come with service holes punched for plumbing and electrical work, ensuring that trades can begin their work without modifying the structure.
Steel floor systems are used in double-storey builds and split-level homes. Joists are engineered to span longer distances than timber, reducing the need for support walls or beams. They’re designed to accommodate ducts and service lines, helping builders achieve better clearance for plumbing and HVAC systems.
These systems are compatible with various flooring types and are quick to install with brackets and fixings supplied.
Steel roof trusses are lightweight and strong, offering clear spans across wide sections of the home. These trusses are custom-designed to suit specific roof pitches and loading requirements. Delivered pre-assembled or in component form, they’re quicker to lift into place and install than traditional framing.
They also allow for architectural features such as raked ceilings, attic spaces or roof-mounted services.
Detached homes, townhouses and dual occupancy builds benefit from fast turnaround framing. Time pressures in the residential market make it essential to reduce construction durations without affecting quality.
Steel framing offers a dependable option for builders seeking to finish framing within tight windows and move quickly into lock-up.
Low-rise commercial buildings, including retail units and small office spaces, can be framed using light gauge steel. Fast fabrication ensures quicker project launches and supports compliance with commercial construction programs.
Steel also supports open floorplans and easy integration of services, making it ideal for high-traffic or flexible use buildings.
Community and government-funded projects often face strict deadlines linked to funding or operational start dates. Fast turnaround steel framing supports project compliance and reduces the risk of overrun.
These projects often use repeatable designs, which can be prefabricated and delivered to site on schedule.
Steel frames provide a stable base for a variety of cladding systems, from fibre cement sheeting to brick veneer and lightweight composites. Fixing points are accurately placed, which improves finish quality and reduces time spent aligning external layers.
Roof trusses support metal sheet roofing, tiles or insulated panels and are engineered to suit wind loads and drainage requirements.
Steel wall frames remain straight and square, simplifying plasterboard installation and joinery fitting. This reduces patching and adjustment time for finish trades. With pre-punched service holes, the layout of electrical and plumbing systems is faster and cleaner, improving overall build speed.
Insulation and acoustic treatments also fit easily into steel framing cavities, helping builders meet energy ratings.
Steel framing works well with slabs, stumps or suspended floor systems. The reduced weight of steel allows for more flexible foundation design, which can be important on sites with limited access or soil issues. Raised floor systems can be framed quickly, providing level platforms for sloping sites or flood-prone areas.
Melbourne’s building regulations, wind classifications and fire zone requirements all affect framing design. A framing supplier with local experience can help builders meet these standards without delay. They understand council approvals, engineering documentation and supply logistics in the region.
Builders should partner with suppliers who can provide shop drawings, compliance documents and site-ready deliveries.
Suppliers offering fast turnaround services must have the manufacturing capacity to handle large or urgent orders. Investing in automated production lines and skilled design teams ensures that lead times are kept short and orders fulfilled accurately.
Consistency in supply is critical for builders managing several projects or large-scale developments.
Some steel frame suppliers provide installation services or work with preferred contractors to ensure framing is correctly erected. This reduces the chance of errors during assembly and ensures compliance with engineering specifications.
Even when supply-only is chosen, detailed instructions and responsive support help keep construction moving efficiently.
Production times vary depending on project size, but many suppliers in Melbourne can deliver steel framing within one to two weeks of final design approval. Some systems are available on express timeframes for urgent projects.
Yes. Steel framing is non-combustible and works well in designs requiring high Bushfire Attack Level (BAL) ratings. It is commonly used in outer suburbs and regional areas where fire compliance is a requirement.
Initial material costs may be higher, but reduced labour, waste and build time often balance the total cost. Long-term performance, reduced maintenance and insurance advantages also contribute to better value.
The demand for fast turnaround steel framing solutions in Melbourne reflects a shift in the building industry toward faster, smarter, and more consistent construction methods. Steel framing systems offer builders a reliable way to stay on schedule, reduce waste and simplify coordination across trades.
With off-site fabrication, minimal on-site cutting, and compatibility with prefabricated wall frames, these systems offer practical advantages for residential, commercial and public sector projects. Melbourne builders working under time pressure can gain a clear advantage by partnering with local suppliers who deliver not only steel but complete framing support.
As the construction market continues to evolve, steel framing remains a future-ready choice that balances strength, speed, and compliance in every build.
Australia’s construction landscape continues to evolve, with multi-level buildings becoming a standard feature in urban and suburban areas. Meeting the structural demands of these developments requires precision, efficiency, and collaboration.
Custom steel solutions for multi-storey projects play a major role in this space, offering adaptable, engineered framing systems that meet safety, performance, and time expectations.
Builders, architects, and engineers are turning to tailored steel packages supported by digital tools to improve delivery outcomes. A critical part of this shift is the adoption of BIM steel framing detailing Melbourne teams are increasingly relying on to handle structural complexity and site-specific coordination.
These models form the backbone of how custom steel framing is visualised, analysed, and executed on multi-storey builds.
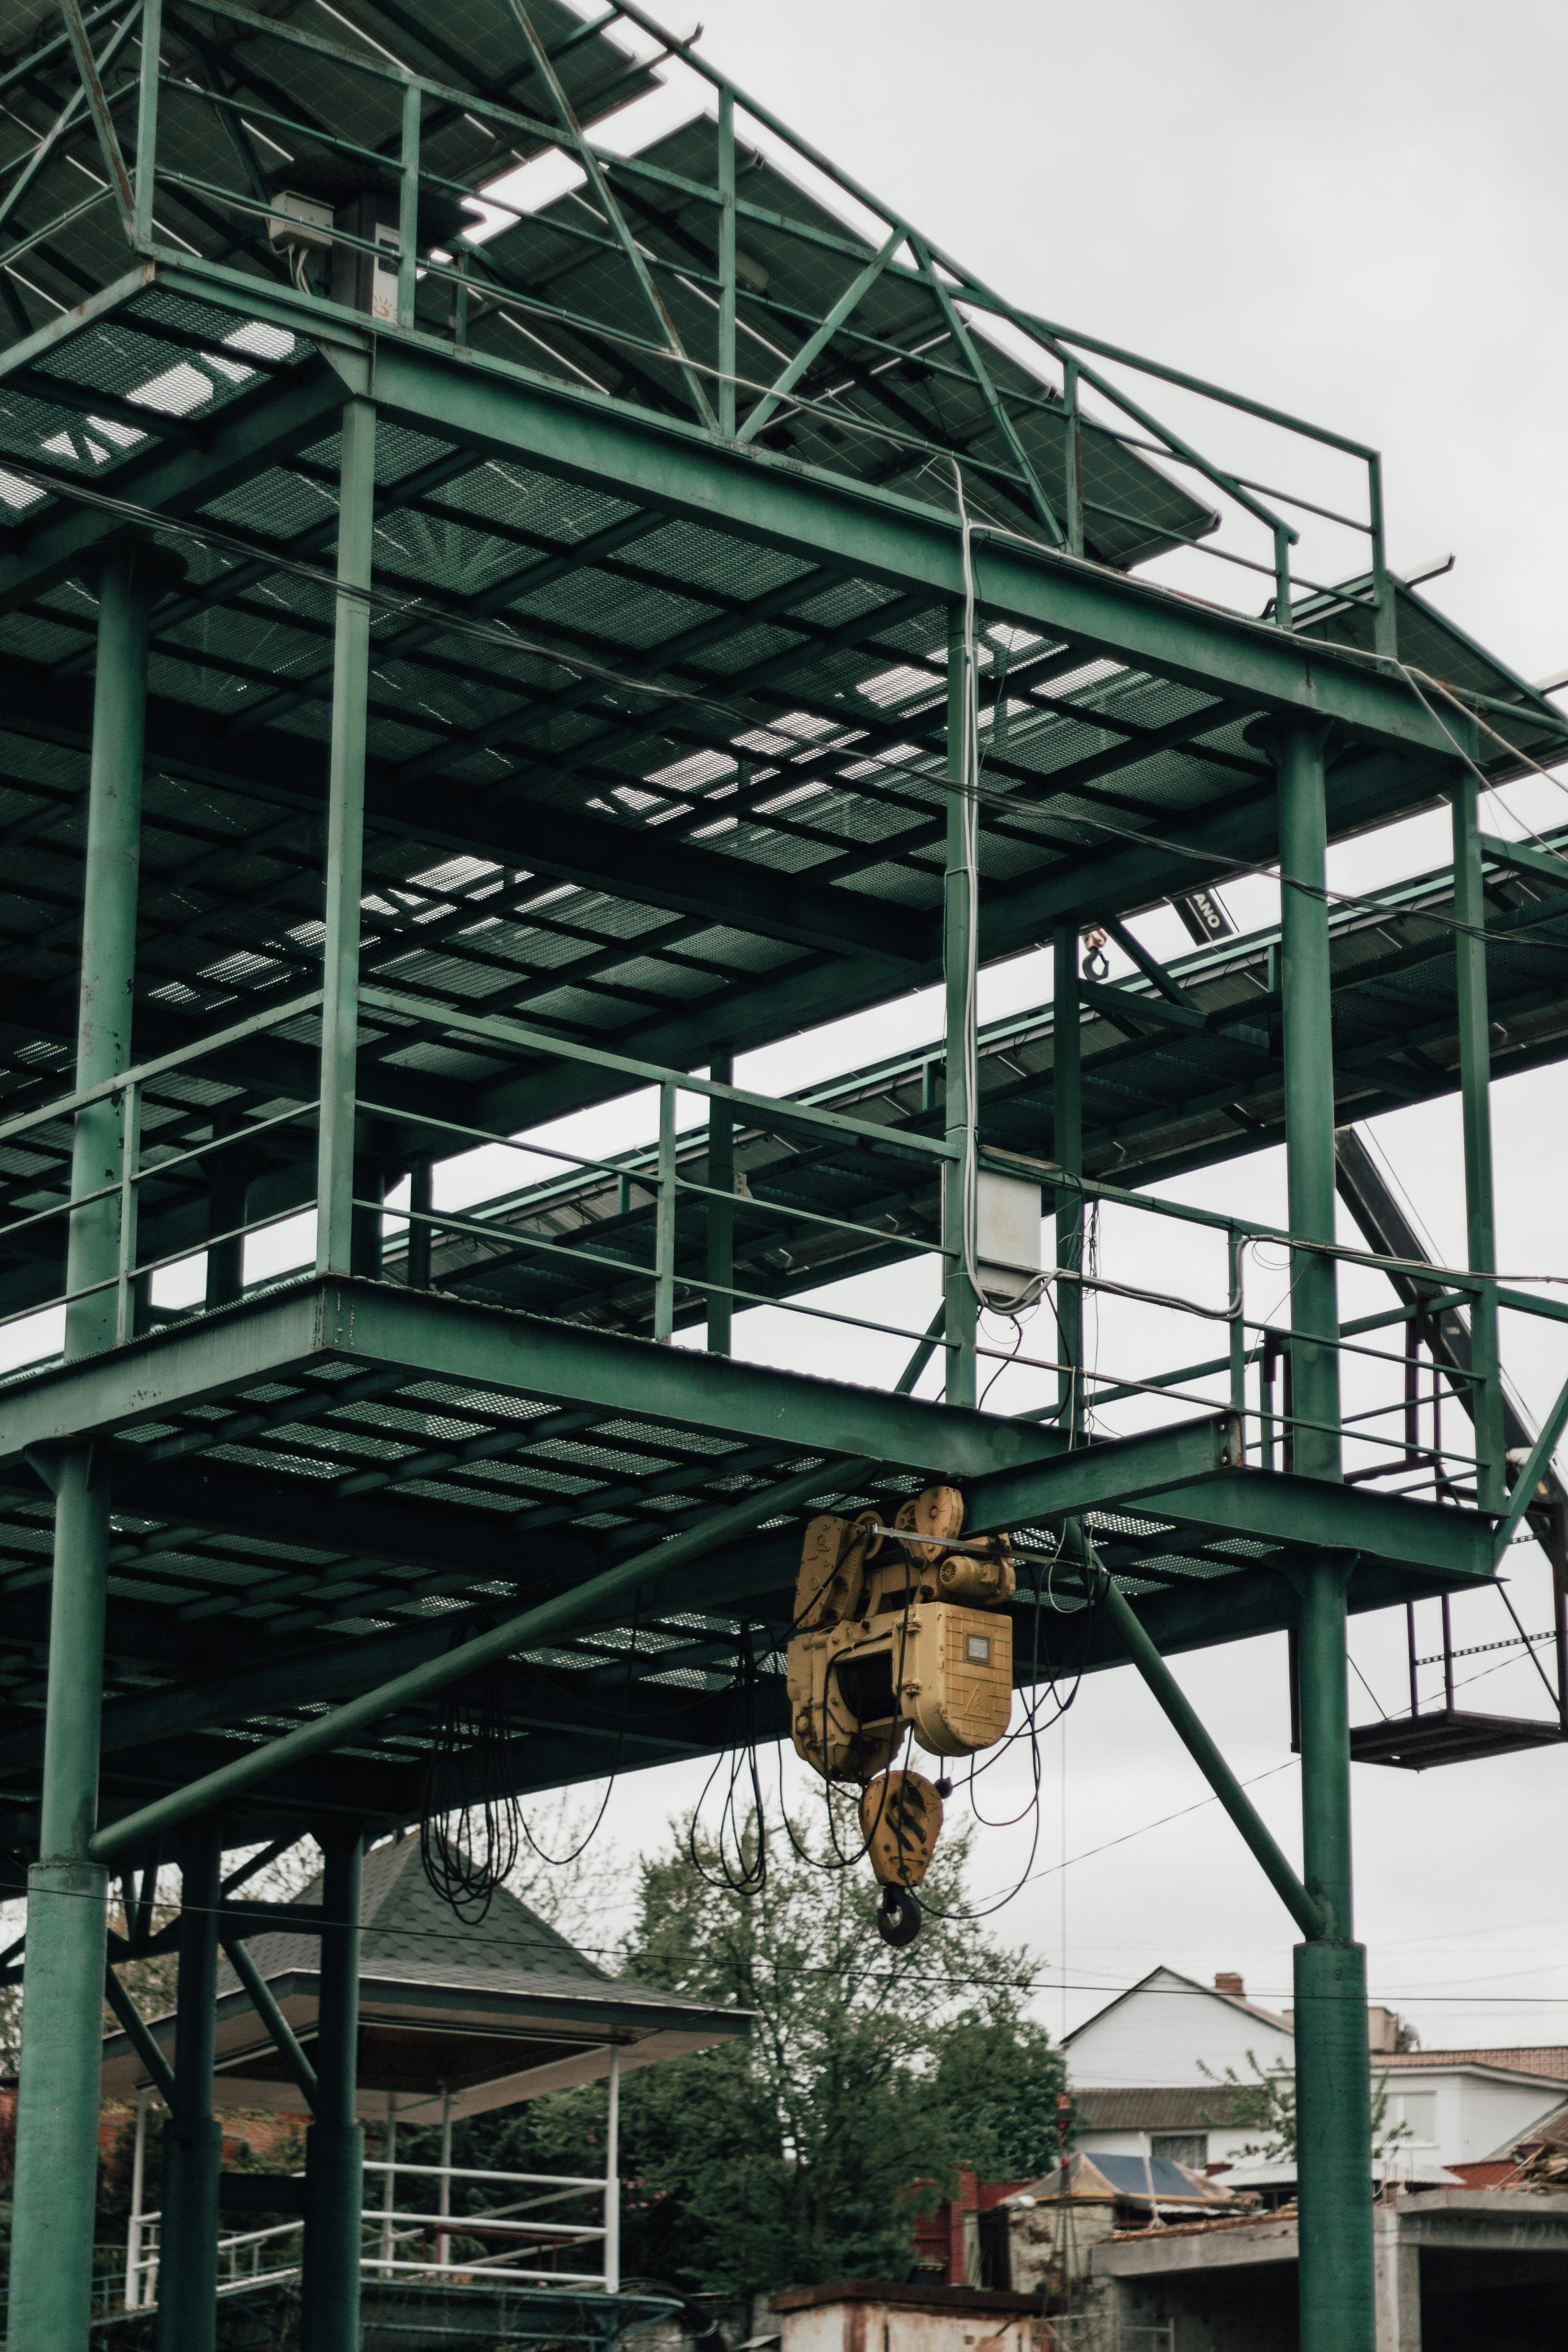
Steel framing brings consistent strength-to-weight performance, enabling taller structures with wide internal spans and fewer support columns. Unlike timber, steel remains stable regardless of humidity or pest exposure, making it a better fit for builds involving apartments, townhouses, or mixed-use spaces with ongoing occupancy and high loading.
With multi-level residential projects demanding reduced build time and higher energy efficiency, steel framing supports faster assembly, reduced waste, and integration with performance-rated insulation systems.
As projects grow more complex, builders are no longer relying on generic frame kits. Instead, they are choosing custom steel systems designed specifically for the building’s layout, occupancy load, and sequencing.
The use of BIM steel framing detailing Melbourne services enhances this process by providing a digital replica of the framing structure. Coordination between trades, services, and structural elements becomes easier and more predictable.
Each custom steel frame package begins with a detailed understanding of the build. Structural engineers analyse the soil report, wind classification, bracing requirements, and fire rating compliance. This allows them to design framing systems that meet both the architectural goals and structural demands.
Frame members are selected based on the span they must cover, the load they must carry, and how they connect with other building systems.
Custom solutions allow for modular construction, where framing panels are fabricated off-site in sections and assembled in sequence. These modules can include wall frames, floor joists, and roof trusses for each level, aligned with the builder’s planned work stages.
Scalable solutions are especially useful in townhouse rows or apartment stacks, where repeating layouts must be supported by strong yet lightweight materials.
The process begins by evaluating architectural drawings alongside engineering inputs. This includes room layouts, stairwell positions, service ducts, and facade detailing. Any conflicts or performance concerns are resolved before fabrication begins.
Engineers also work to optimise framing layouts for reduced waste and faster installation, suggesting adjustments to internal wall placements or floor levels if needed.
Once designs are confirmed, 3D models are created to reflect the steel framing structure. These models incorporate everything from studs and noggings to truss connections and bolt layouts. Service routes for electrical, plumbing, and HVAC are mapped onto the framing to check for clashes or interference.
The model becomes a central file that all trades reference during planning and installation, reducing uncertainty and site delays.
After the model is signed off, fabrication drawings are created for each frame component. These are then sent to CNC roll-forming machines where steel coils are processed into exact lengths and hole patterns.
Each part is labelled, bundled, and prepared for just-in-time delivery, reducing the need for on-site storage and minimising handling errors.
Prefabricated steel framing arrives on site ready to install. With each wall, floor, and truss labelled and pre-punched, builders avoid the time-consuming tasks of measuring and cutting. Projects move from slab to lock-up in a shorter timeframe, improving return on investment and keeping development schedules intact.
This is especially useful in multi-storey settings, where staging and floor-by-floor delivery must be managed tightly.
Custom steel frames provide non-combustible structure from ground to roof. This supports compliance with fire regulations in apartment buildings and attached housing developments. Steel frames also eliminate the risk of termite damage, removing the need for ongoing treatments and barrier systems.
Builders can use fire-rated cladding and linings with confidence, knowing the framing beneath meets code expectations.
Steel framing can be detailed to include cavity insulation, thermal breaks, and window reveal systems that align with energy-rated envelopes. This is essential in achieving the energy performance targets required in new residential developments.
The use of digital models also helps locate areas of potential heat loss or bridging, allowing engineers to improve thermal detailing during the design phase.
Each level of a multi-storey building relies on precise load-bearing wall alignment. Custom steel frames are designed to transfer loads vertically without deviation, allowing for consistent performance across all floors.
Wall frames are designed with access for services, acoustic detailing for inter-tenancy walls, and fixing points for cladding, linings, and cabinetry.
Steel floor joists are engineered based on span length and anticipated live loads, such as foot traffic, appliances, or furniture. Joists are spaced and braced to allow for mechanical service runs and insulation batts, with sound-reducing layers added where needed.
Some systems include prefabricated cassettes, which are delivered and dropped into place, reducing manual labour.
The roof structure of a multi-storey project often includes overhangs, balconies, or parapets. These must be factored into truss design early in the process. Steel trusses allow for longer spans and more complex roof shapes without adding excessive weight to the structure.
Custom steel detailing also supports the addition of solar systems, roof gardens, or skylights, depending on the project requirements.
With multi-storey projects often constrained by crane schedules or access limitations, steel frames are delivered floor by floor in sequence. This limits site congestion and ensures builders have only the framing they need for the current stage.
Frame sets are colour-coded, labelled, and shrink-wrapped to reduce the risk of errors or damage during transport.
Steel framing teams often provide installation support or training. This includes clear fixing schedules, connection diagrams, and advice on handling site-specific framing adjustments.
For projects using BIM steel framing detailing Melbourne specialists, the digital model is sometimes made accessible via tablets or cloud systems, allowing the site team to reference drawings live during installation.
Yes, steel framing systems can be engineered for buildings up to and beyond five storeys. The key is ensuring that floor loads and cumulative structural forces are considered in the design phase. Engineered steel members and connection systems are selected based on project scale.
Acoustic insulation, sound batts, and separation layers are integrated into floor systems. Steel framing teams design these systems to meet inter-tenancy acoustic performance codes, particularly in apartments and dual occupancy developments.
Minor changes may be accommodated, but major structural changes should be resolved before fabrication begins. BIM modelling allows for last-minute checks and small revisions, but changes after CNC cutting can delay delivery or affect framing performance.
The move toward high-density, multi-storey residential and mixed-use development is changing how projects are designed and delivered across Victoria. Custom steel solutions for multi-storey projects provide the reliability, efficiency, and compliance required to meet today’s demands, from the ground slab to the final roof truss.
By incorporating tailored engineering, digital collaboration, and structured delivery, builders are able to manage complex builds with fewer delays and more predictable outcomes. The use of BIM steel framing detailing Melbourne teams adopt further enhances communication, service coordination, and on-site performance.
As expectations continue to rise for speed, quality, and energy performance, custom steel framing will remain at the core of how multi-storey projects are safely and successfully built.